Edit store defaults.
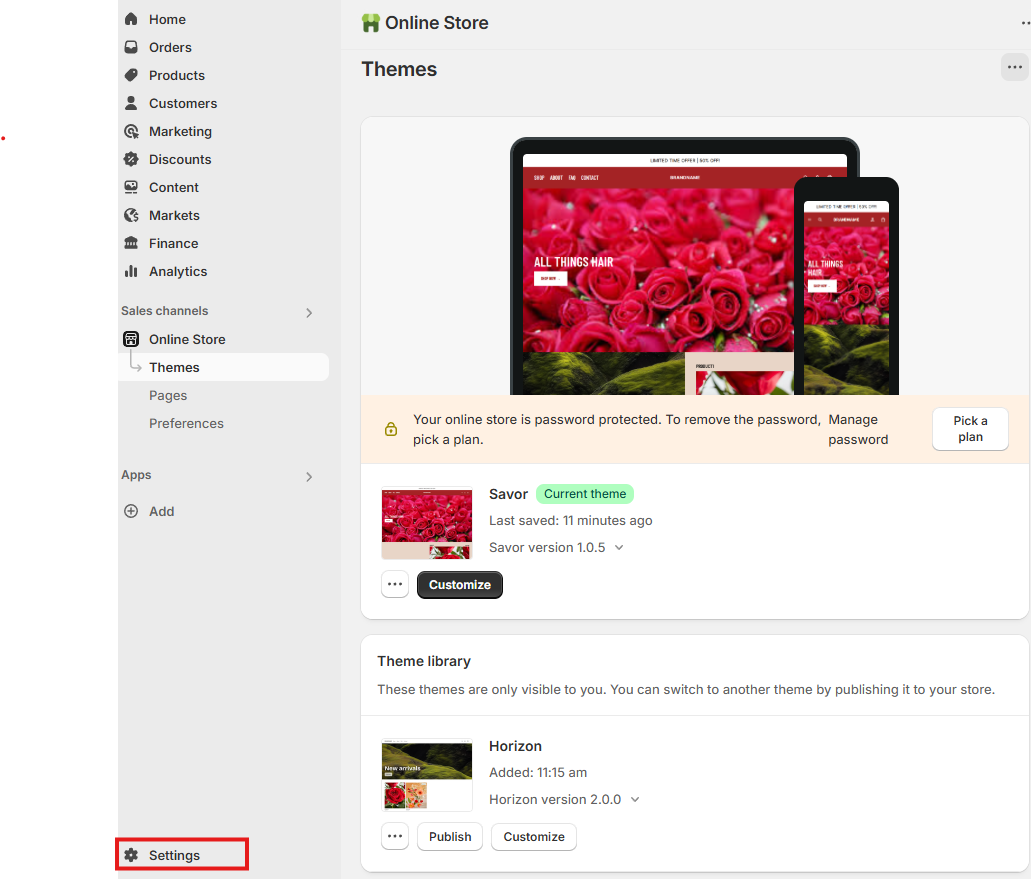
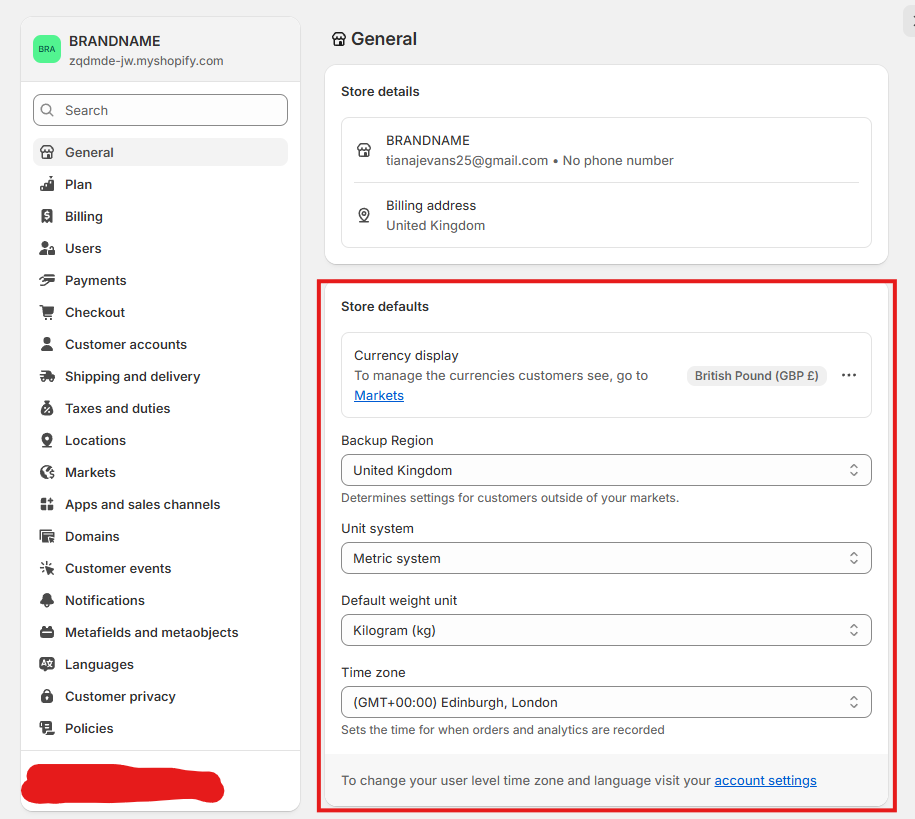
Log in to shopify, and navigate to the dashboard. Go to settings. Select general. In store defaults, you can choose the unit system, currency display, time zone etc.
Order Coms.
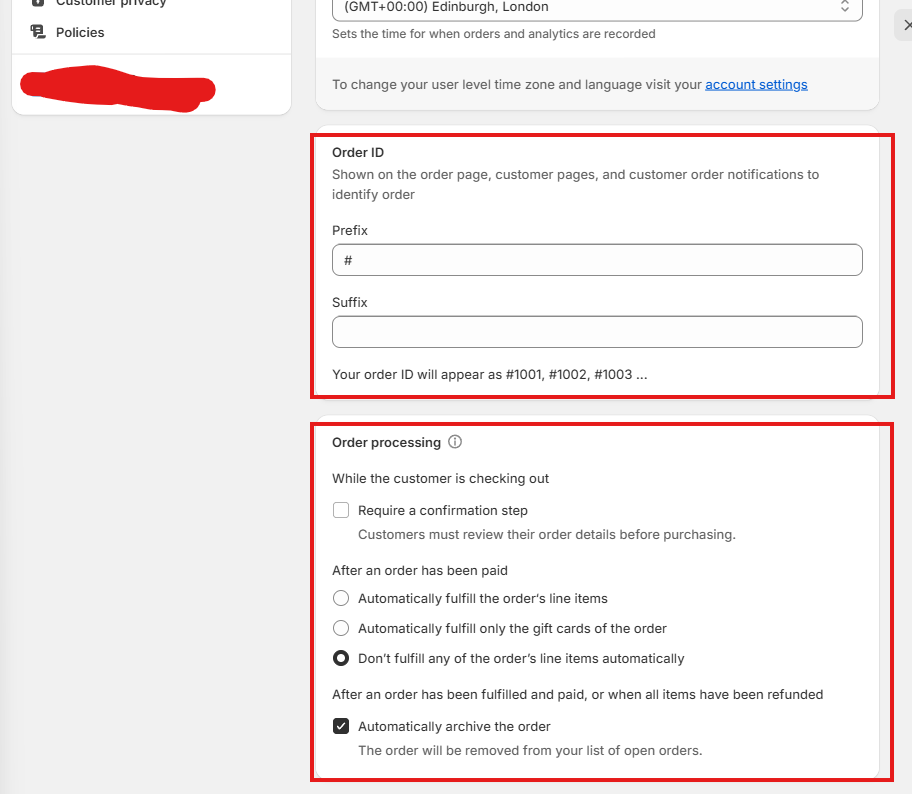
You may decide you want your order numbers to have a prefix or a suffix. The default prefix is # but this can be changed. You may want to add a suffix so that customers do not see their order number and think that you have not made many sales.
I would recommend that you tick ‘Require a confirmation step’ under order processing, as this will reduce having to refund accidental purchases.
The default options for ‘After an order has been paid’ and ‘After an order has been fulfilled and paid’ are probably best left like that.
Metafields and Brand.
I have already set this up - if there is any part of this that you want changed, please get in touch with me. You do not need to worry about resources.
Plan and Billing.
You do not need to worry about ‘Plan’ or ‘Billing’ unless you want to change your shopify payment method. I have myself set up as an admin for your site. I will only use this if you need changes.
Shopify Payments.
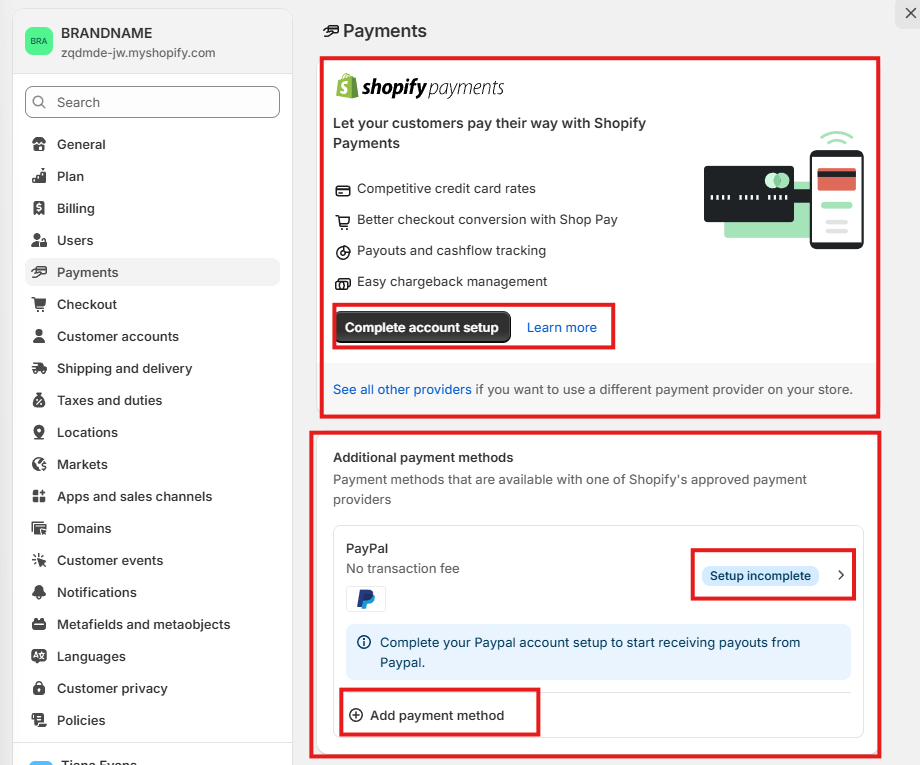
It will be easiest to set up shopify payments, as this is fully integrated into the platform. Click ‘complete account setup’, and the process should be fairly self-explanatory. There is an option to add other providers, but I would be hesitant to use this
You are able to add additional payment methods such as PayPal. You need to make sure that your business paypal is properly attached to the store. You can do this by clicking the arrow, which will help you set it up. If you want to add another payment method, click the + and search for what you want.
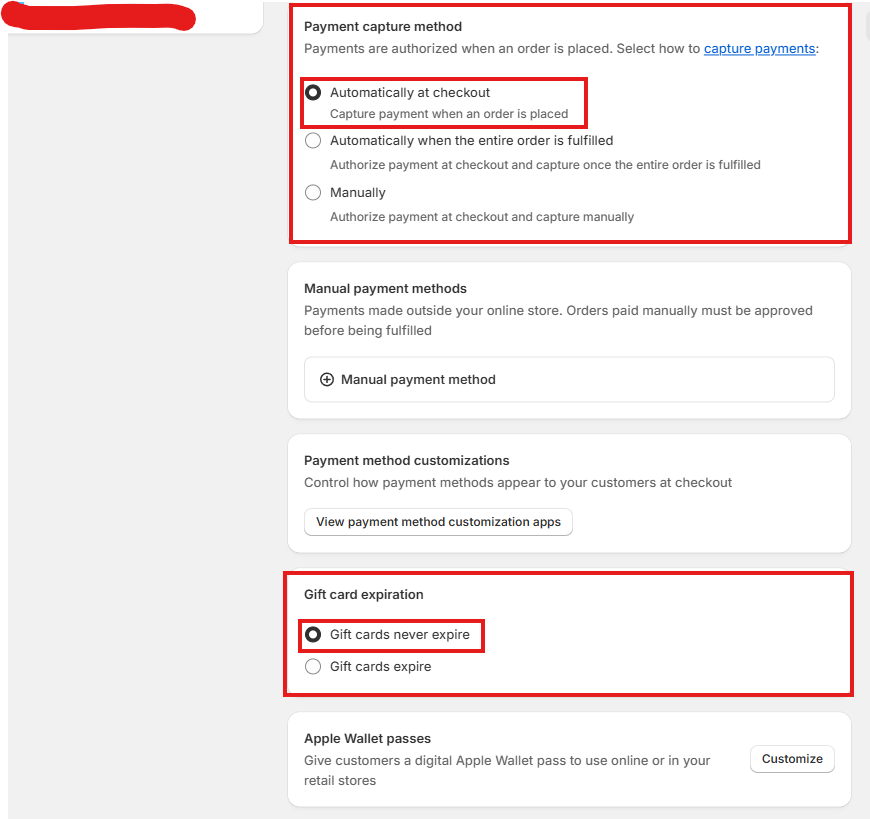
Payment Capture.
This just means the point at which your customer will be charged. The default point at which your customer will be charged is at the point of checkout. This will probably work best. If you want to change it, have a read through the hyperlink for some advice.
You probably won’t need a manual payment method.
I have customized payment methods. If you wish for this to be changed, please get in touch.
If using gift cards, it’s probably more lucrative for you if you set this to ‘Gift cards never expire’
Apple Wallet passes are fiddly. If you get enough traffic, we can discuss setting this up.
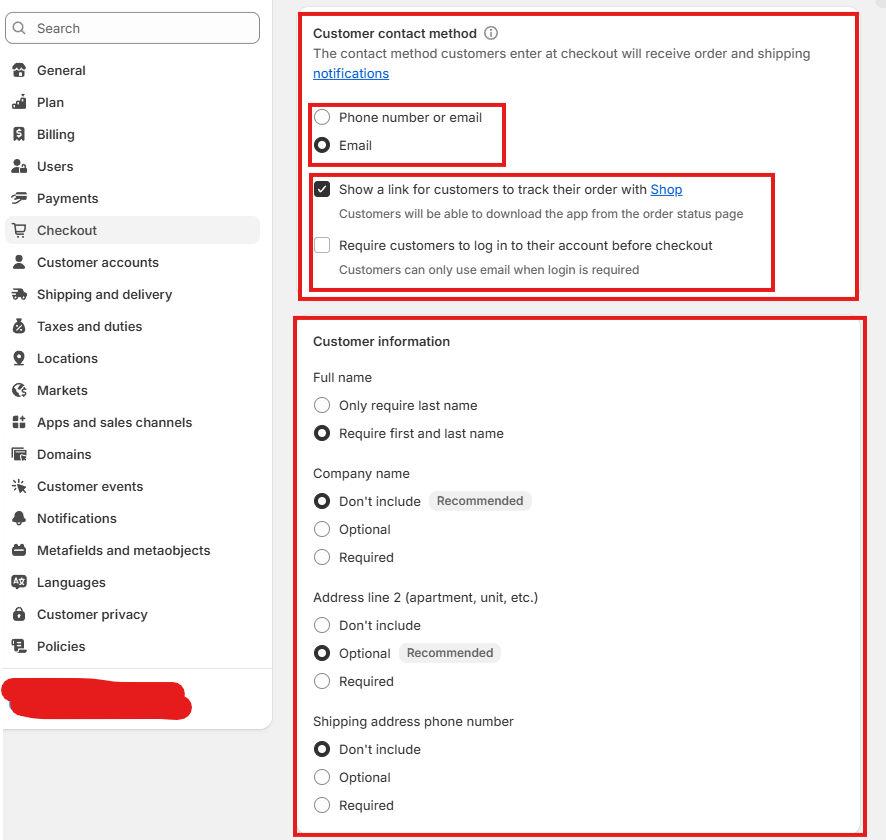
Customer Order and Shipping Notifications.
Shopify handles customer order and shipping notifications. You can choose whether you would like to restrict customers to only entering emails, or whether you want to give them the choice between email and phone number.
You can choose whether or not you would like for customers to be able to track their order with the Shop app.
I think it would be best not to require customers to log in before checkout, as otherwise this might put customers off.
You will likely use the customer information given to package and ship their order, so please customise this to include whatever you need to be able to ship their package.
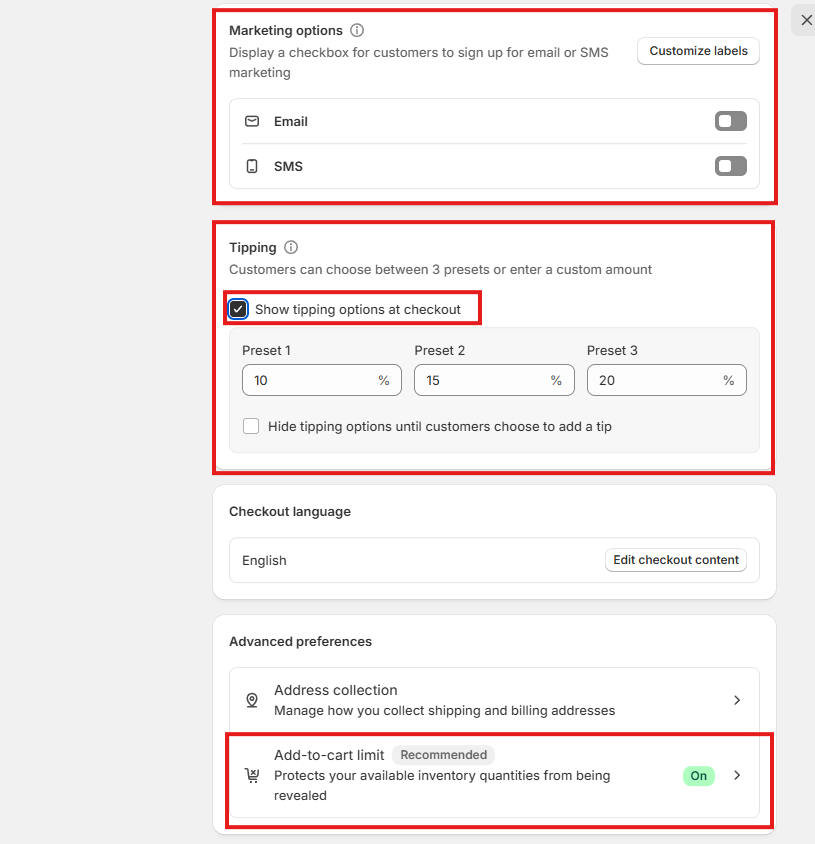
Customer Info and Preferences.
If you want to send marketing notifications to customers, a third party email company will need to be linked. Please get in touch if you want to do this. It is not necessary. I have linked Klaviyo, and will create another guide for this.
If you want customers to be able to tip, tick the box and fill in the presets however you would like.
There is no need to change the checkout language.
Address collection settings are already optimised.
If you want to change your add to cart limit, so that customers cannot buy your entire stock at once, click the arrow. You can then change the limit. It is set at 50 by default
.
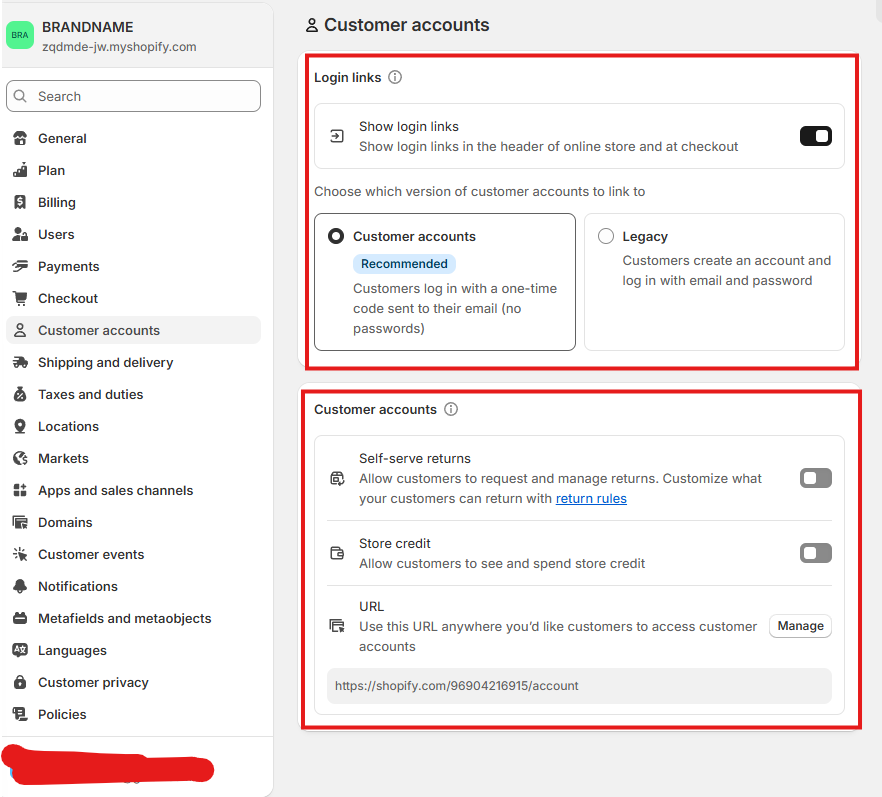
Customer accounts.
These should be kept. This will encourage customers.
It is preferable to remove self-serve returns. This will mean that customers have to contact you before filing a return.
It is preferable to remove store credit. As a small business, this is not needed.
This customer URL will change when we change the site domain name.
Shipping Profiles. THIS IS A VERY IMPORTANT SECTION!!!
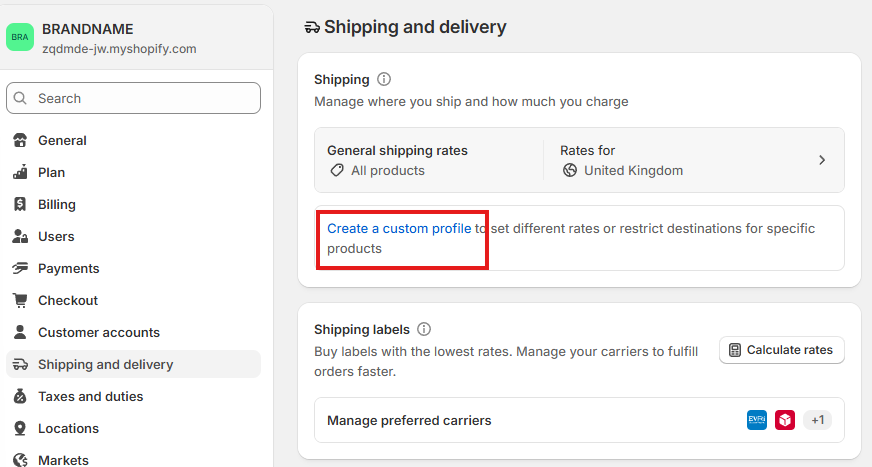
You will need to set up what is called ‘shipping profiles’. This means that you will create a preset of rules which depend on the country which you ship to. I have set up the UK shipping profile. If you want to expand to international shipping, add a new profile.
Click the hyperlink to ‘Create a custom profile’. Name this what you would like. It is best to remain concise but descriptive.
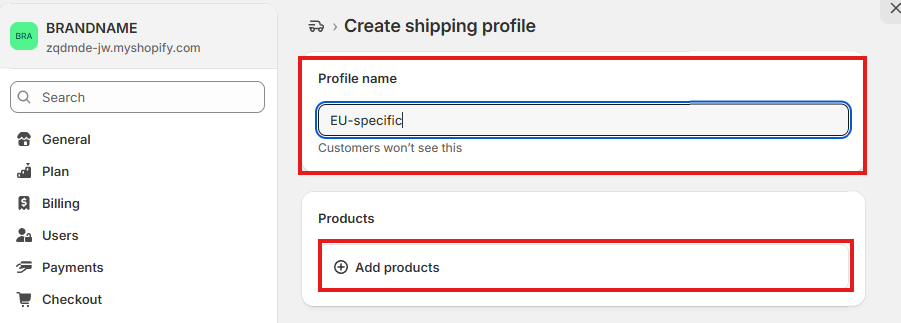
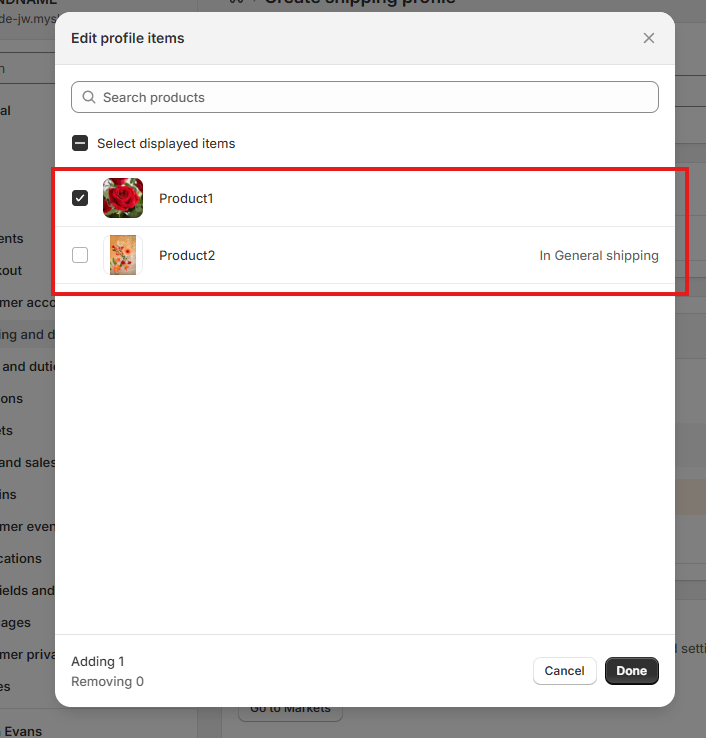
Click 'add products'. Here you can choose whether you would like to include all products, or only certain ones. Tick the ones you want.
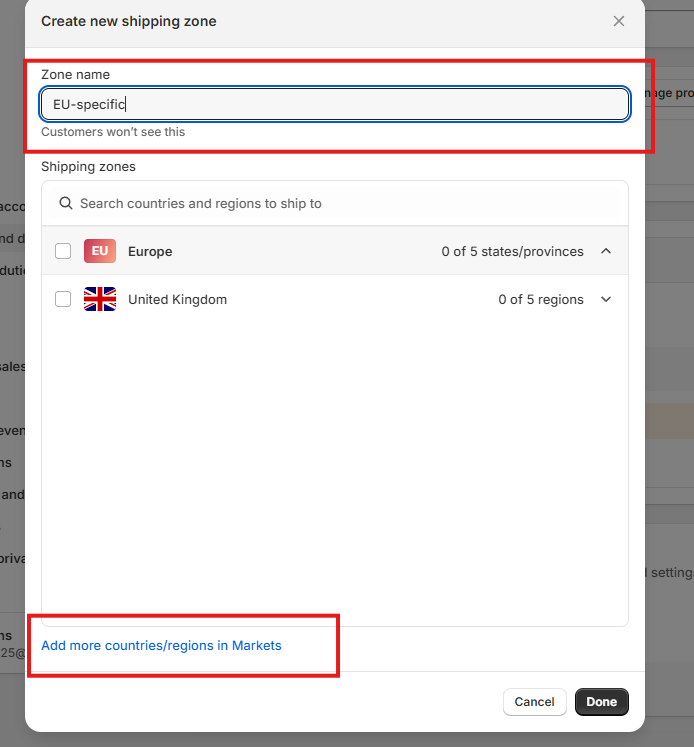
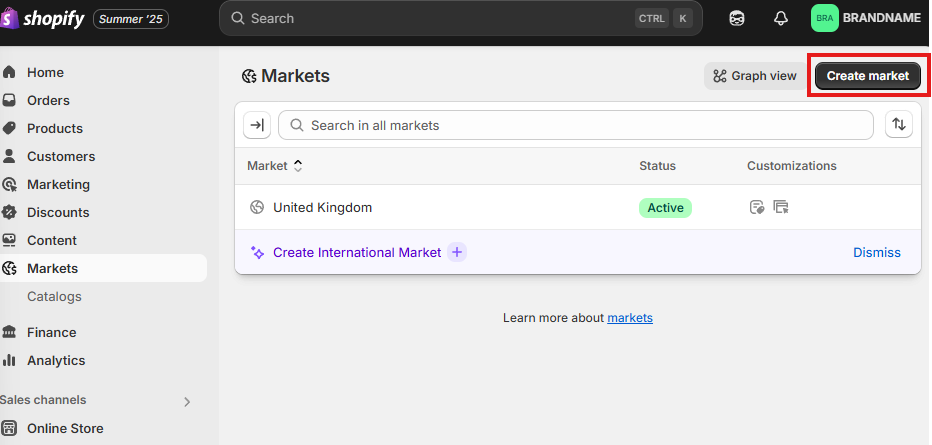
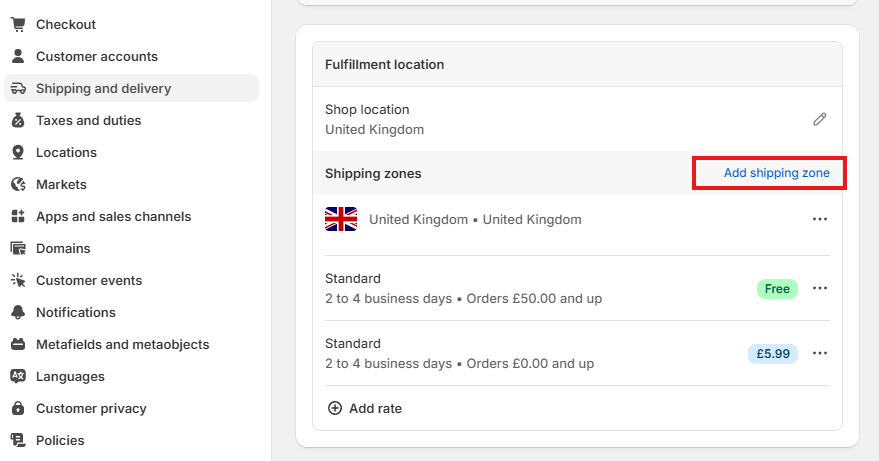
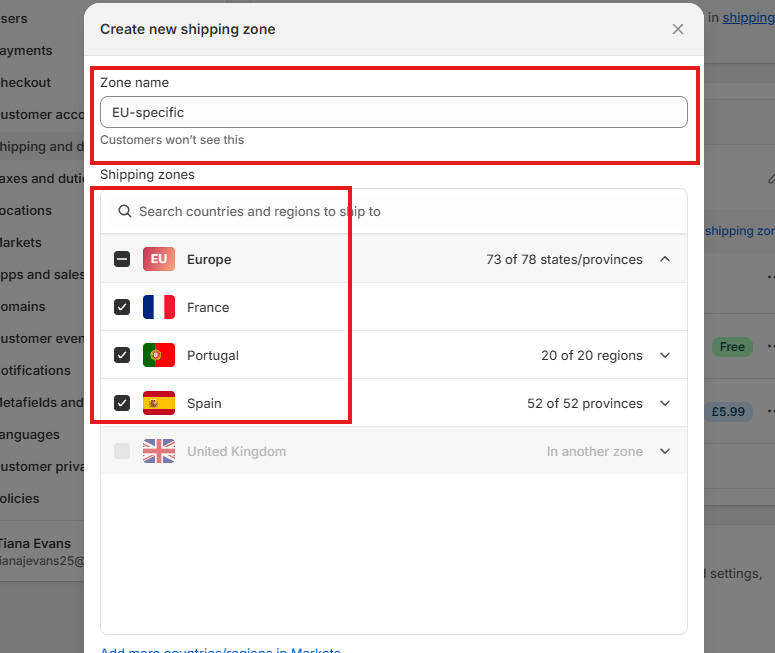
Click the + ‘Add shipping zone’. Name the zone in a similar way to the shipping profile. It doesn’t need to be the same. You then need to click on the hyperlink to ‘Add more countries/regions in Markets’.
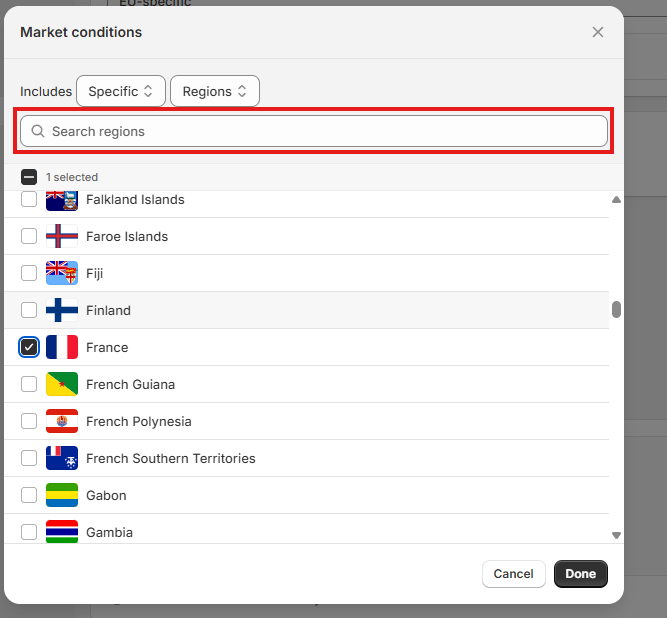
Once in markets, click ‘Create market’. Here, you can name it (name it the same as the shipping zone), choose whether you would like for it to be active or a draft, and add countries. To add countries, click ‘Add Condition’. Add all of the countries that you would like to be included in the profile.
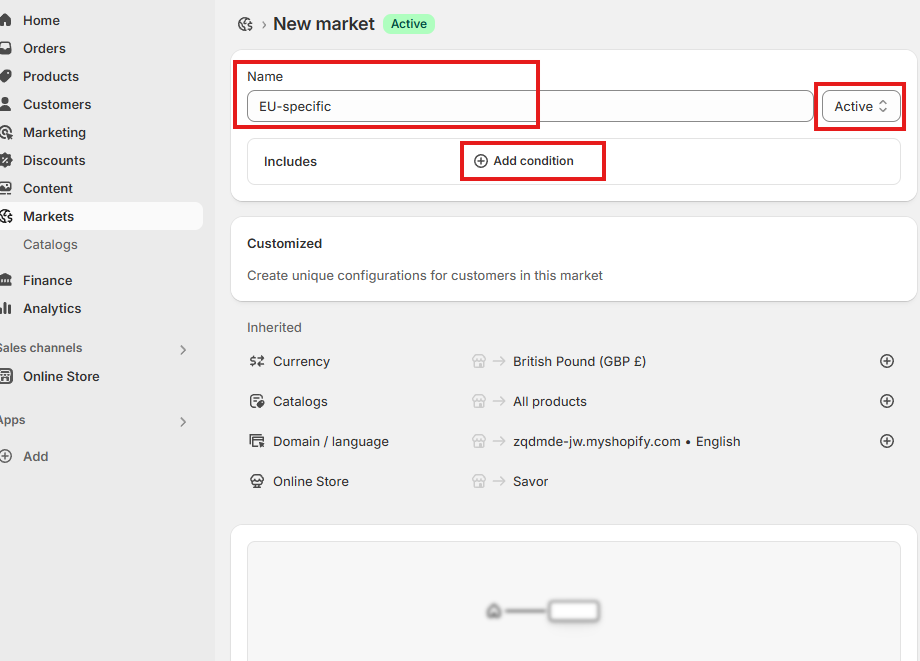
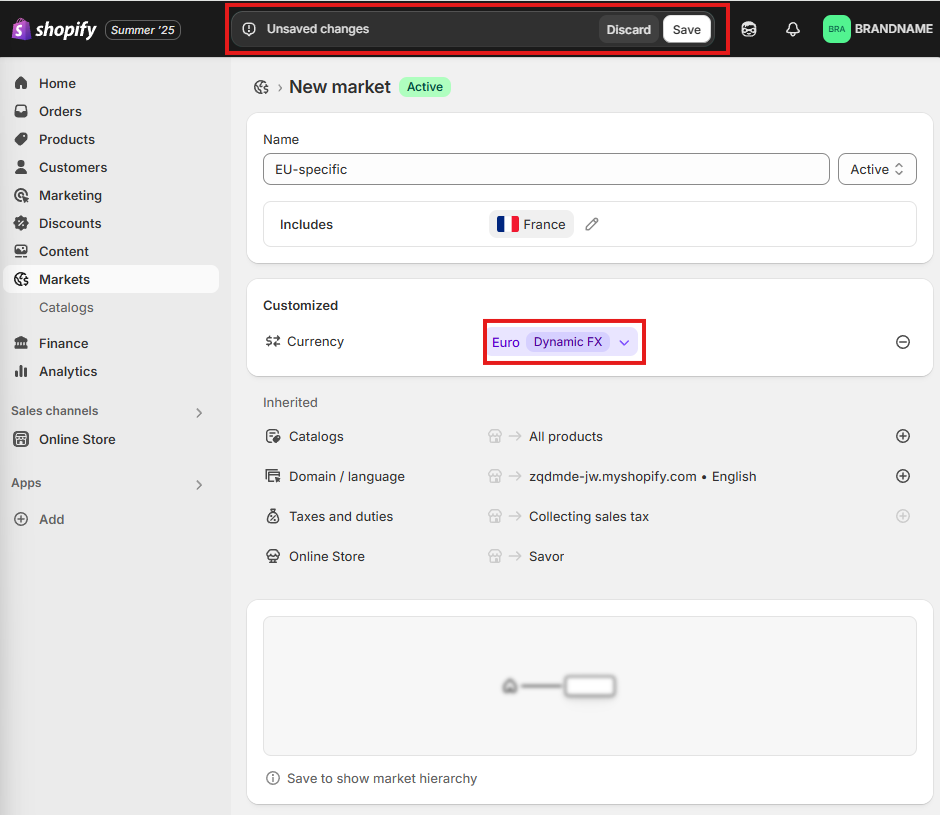
Once you have added your countries, you can choose the currency you would like to be displayed to your customers. Click the purple box and choose the currency. Just use the currency used in those countries. Dynamic FX will convert your prices from GBP to the target currency. Leave the rest of the settings on this page as they are.
Click save at the top of the page. Then you can return to the original settings page. Close the ‘create new shipping zone’ box for now. Save the shipping profile. Point 11 will help you complete this.
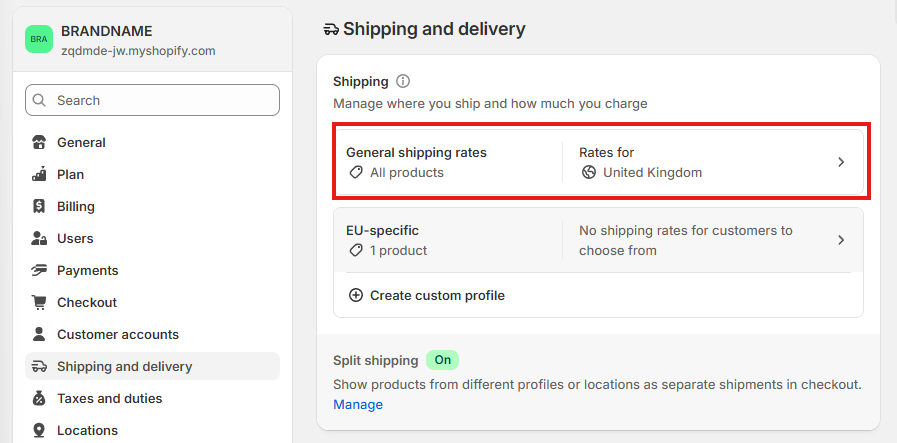
Shipping Rates. THIS IS ALSO A VERY IMPORTANT SECTION!!!
Now you have done some of the work for the shipping profile, you need to manage the product shipping rates.
Click on the arrow for the ‘General shipping rates’.
Click ‘Add shipping zone’. Call this the same name as you have been using so far. Select all of the countries which you would like to use. Click done.
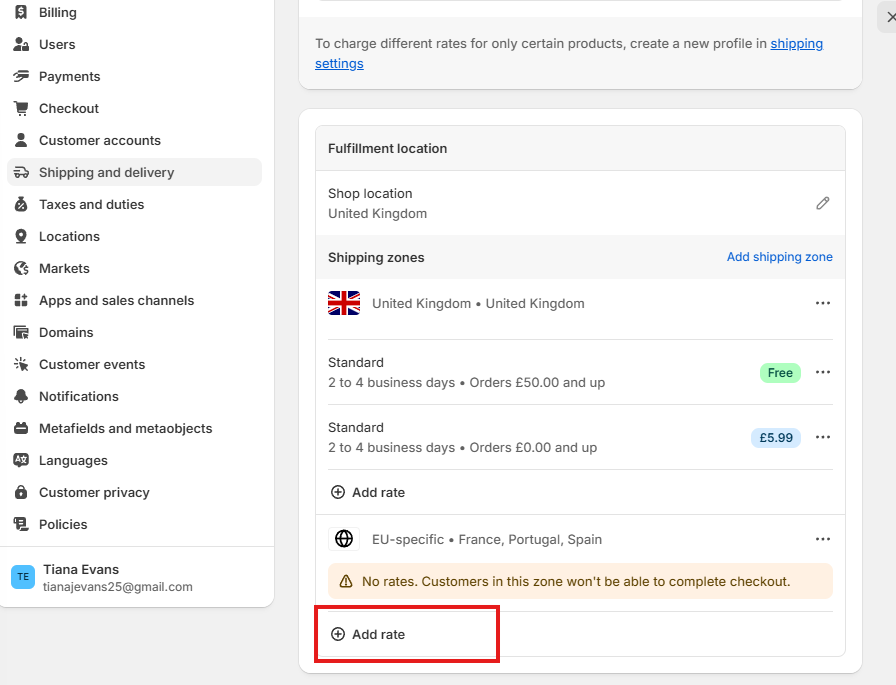
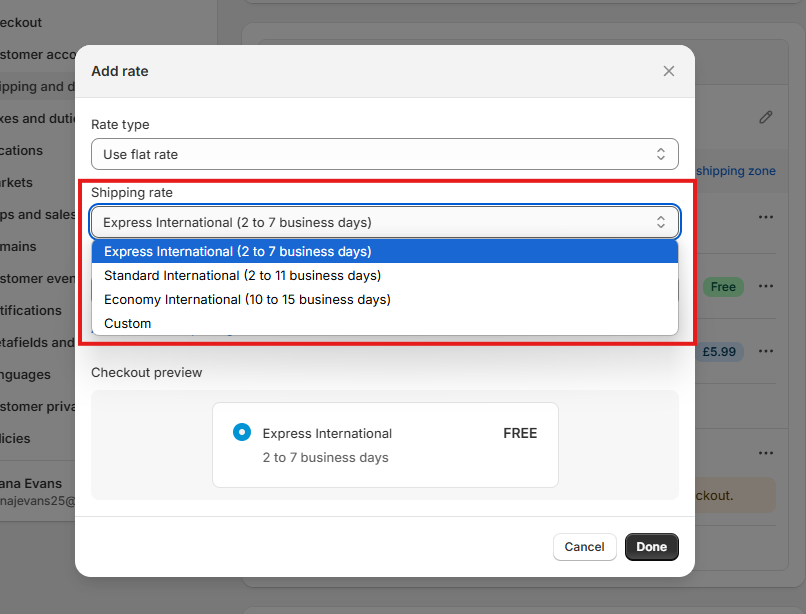
Click ‘Add rate’ under your new shipping zone. Keep this set as ‘use flat rate’. Select one of the preset shipping rate titles, as changing this will make it difficult to keep track of.
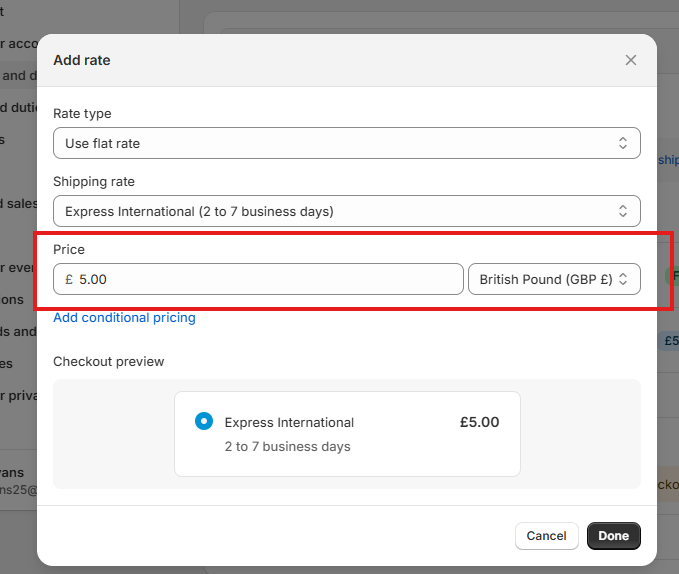
Now set a price for this rate. If you are going to add multiple (e.g. express, standard, economy), make sure that the price is proportionate to the speed of shipping. Choose the currency that is used in your shipping zone.
Click done.
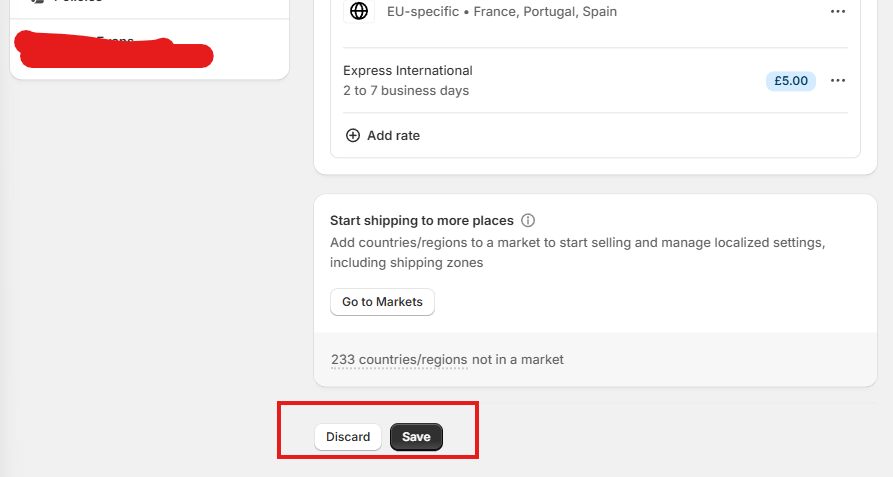
Repeat as is needed. Do this for all zones. You can get really creative and very specific.
Click save at the bottom.
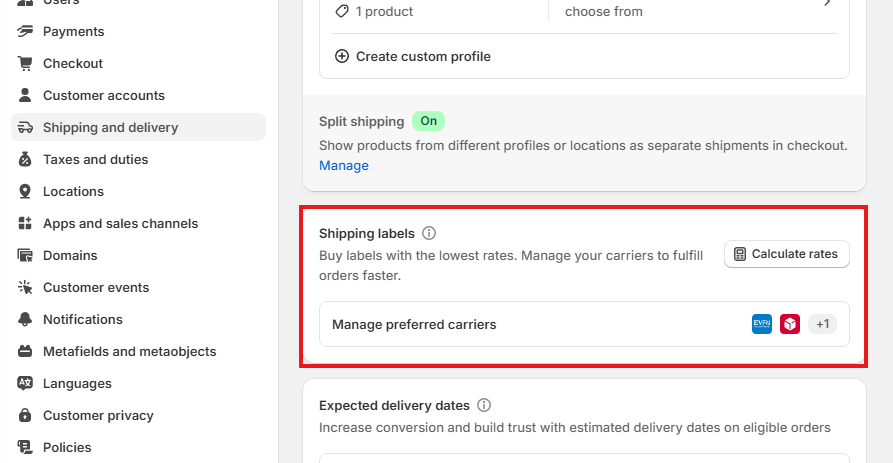
Carriers.
Click ‘Manage preferred carriers'.
Select the carriers that you wish to ship with. This is owner preference.
Delivery Preferences.
You may want to add a shop promise. To do this, you will have to set up a Shop account, or link one if you already have one.
I would advise against setting manual delivery dates unless under exceptional circumstances.
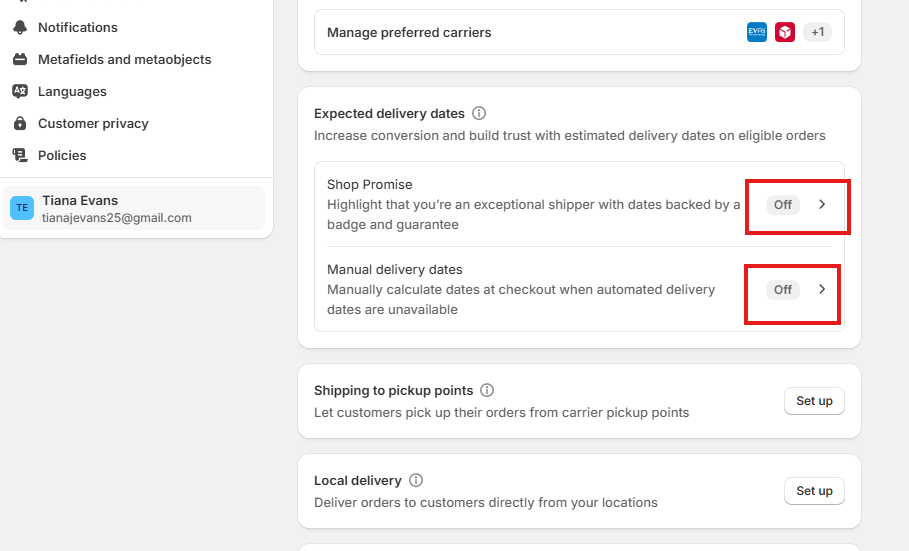
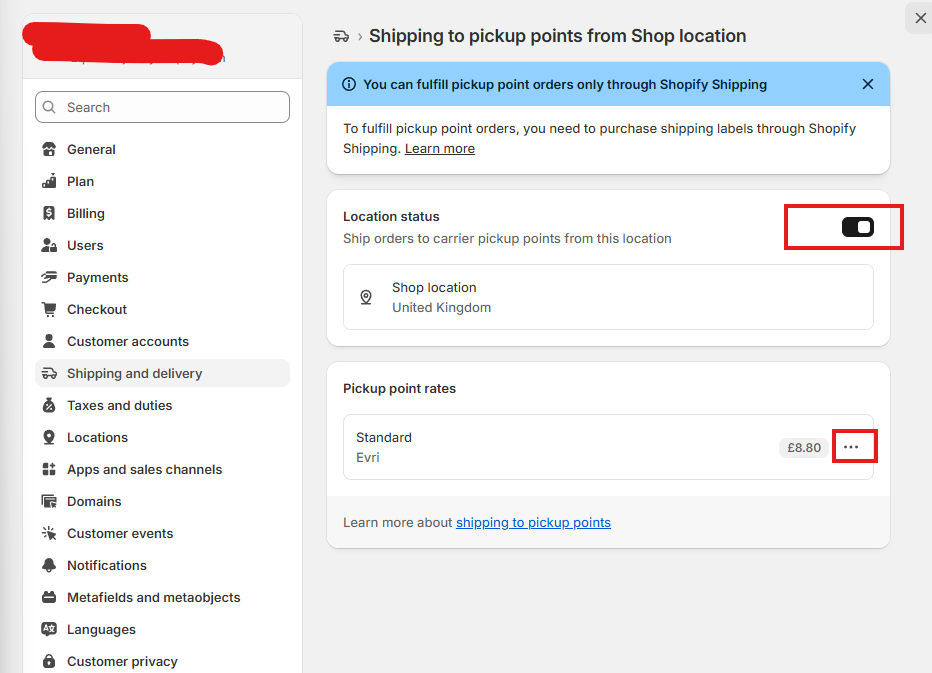
If you would like to allow shipping to pickup points (DpD, InPost), click ‘Set up’.
Click on the shop location you wish to use.
Click to slider to allow to ship orders to pickup points.
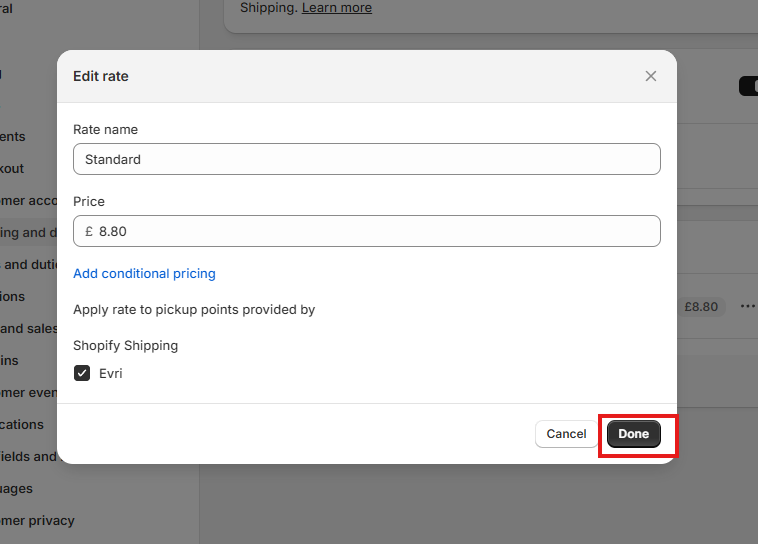
Select a carrier, and set a rate for this option of shipping by clicking the three dots.
You will have to send orders through shopify if you want to do this, by purchasing shipping labels from them. I am not sure how the costs compare.


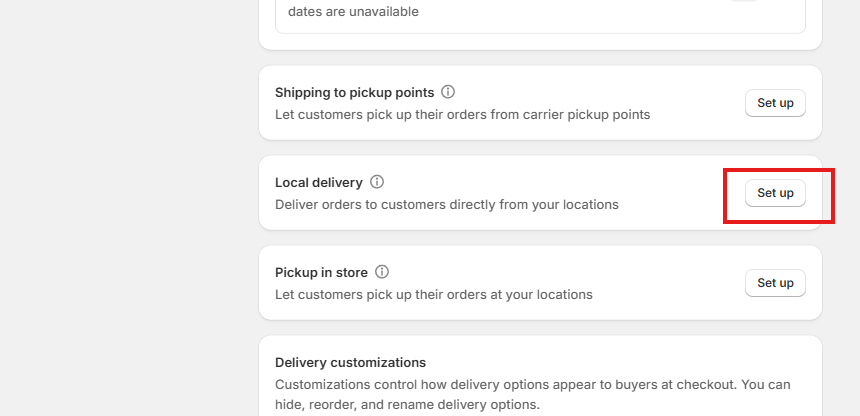
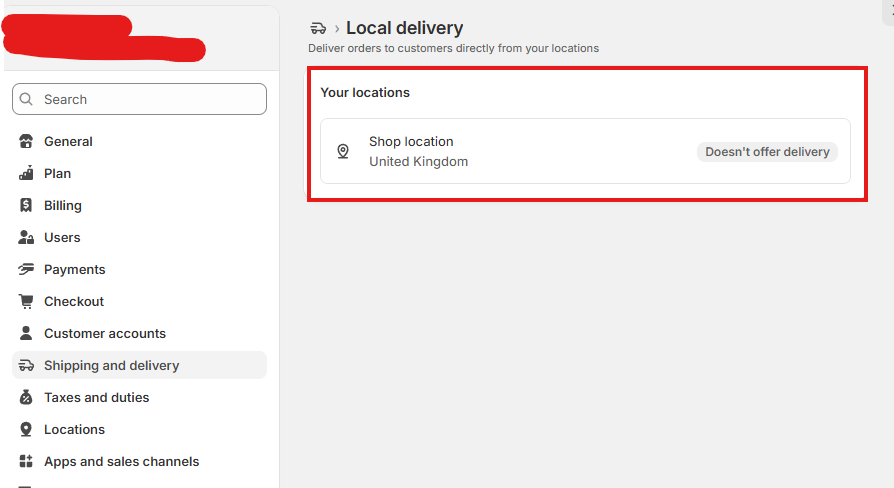
If you would like to allow local delivery (doing it yourself without a carrier), click ‘Set up’.
Click on the shop location you wish to use.
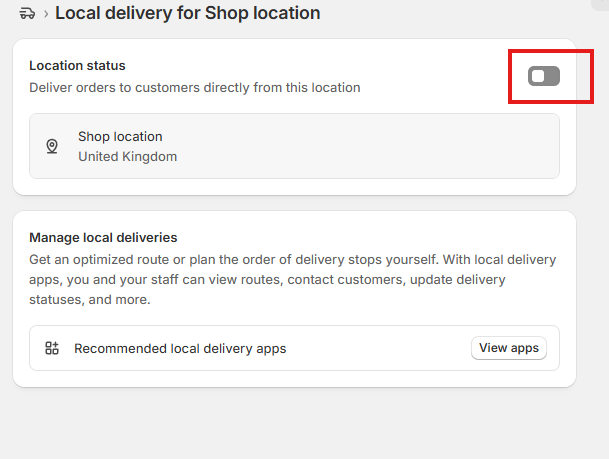
Click to slider to allow to deliver orders to customers directly from this location.
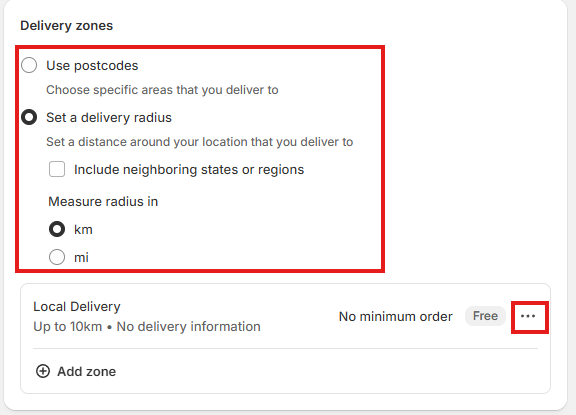
Select postcode areas or a radius to which you wish to locally deliver.
Click the three dots to adjust the delivery price, min and max order price, and delivery details.
Click ‘Save’ at the top of the page.
If you have a large number of staff, it might be worth looking into local delivery apps.
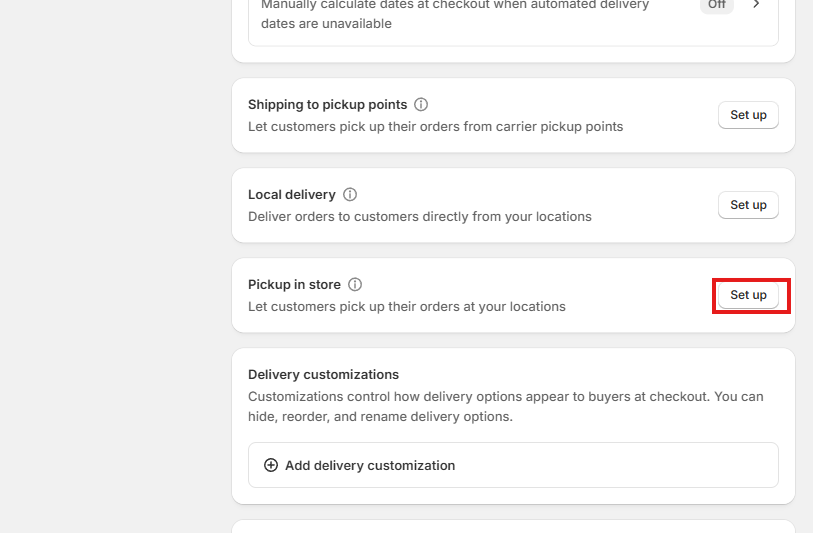
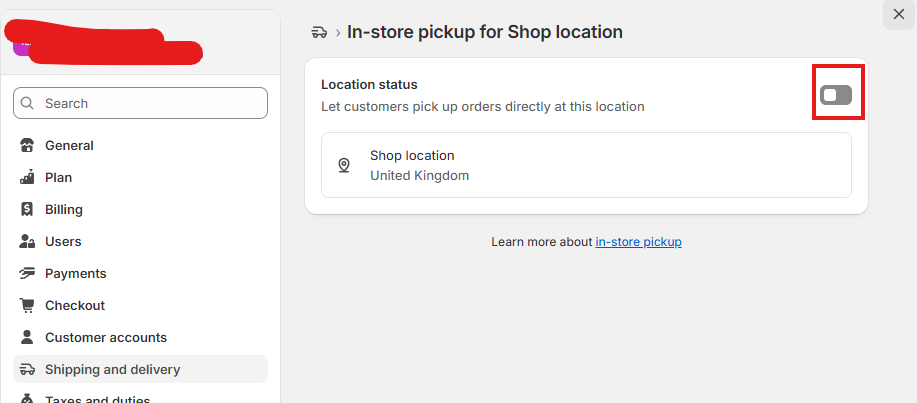
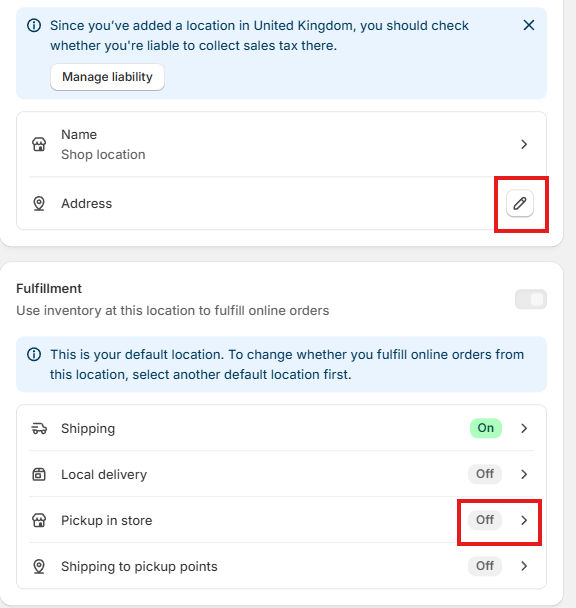
If you would like to allow Pickup in store, click ‘Set up’.
Click on the shop location you wish to use.
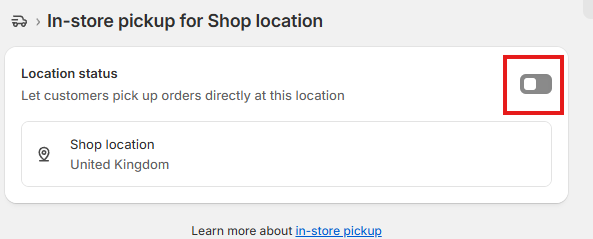
Click to slider to allow customers to pick up from a certain location. You will have to set the shop location to be able to use this feature..
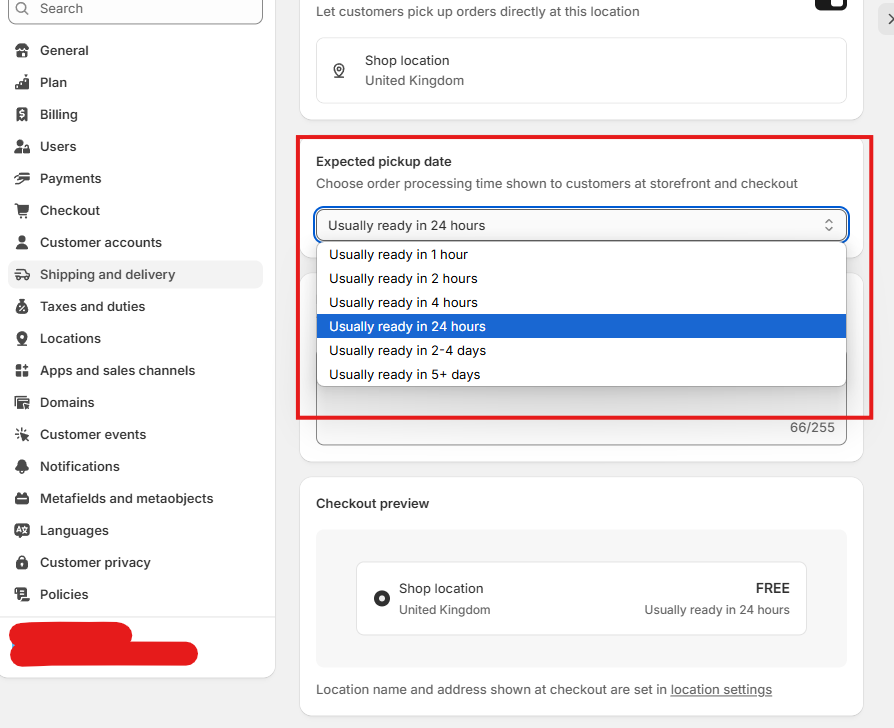
Select an expected pickup date.
Write a ‘ready for pickup’ notification.
Click ‘Save’ at the top of the page.

Seller Shipping Information.
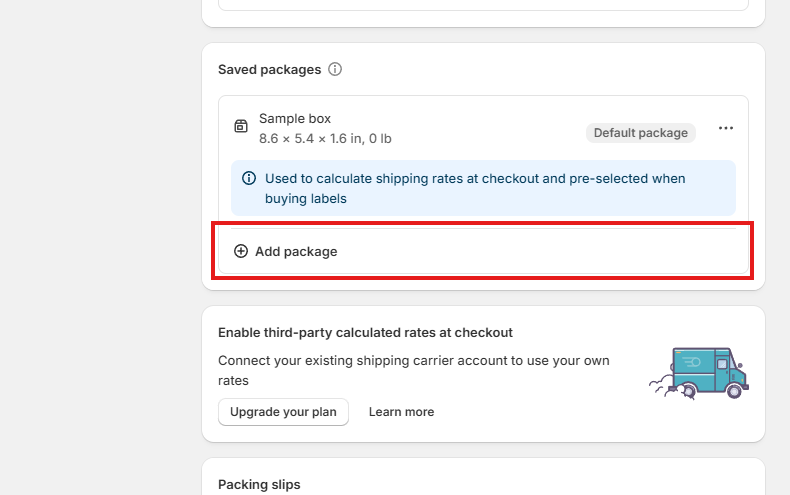
You need to list the size of your packages.
These will connect with products.
Click + ‘Add package’.
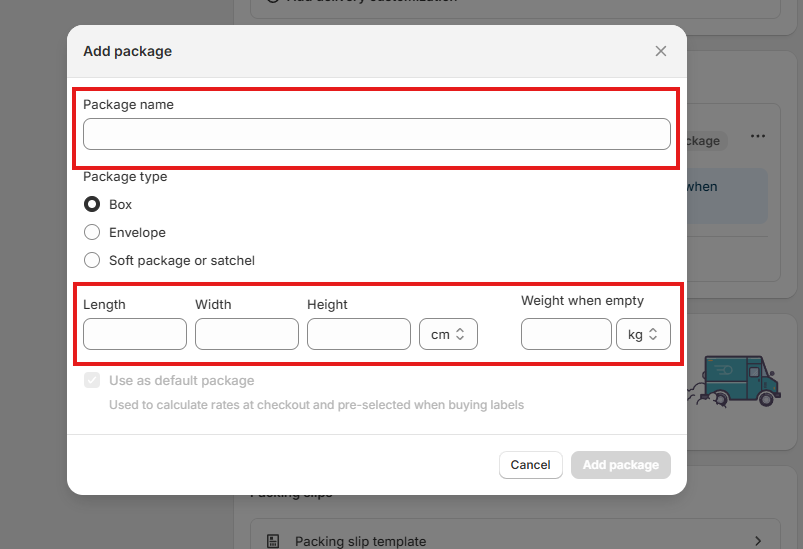
Name the item something descriptive but concise.
Select the package type.
Input the package dimensions.
Click ‘Add package’
Repeat for as many packaging types as you have (e.g. small, med, large).
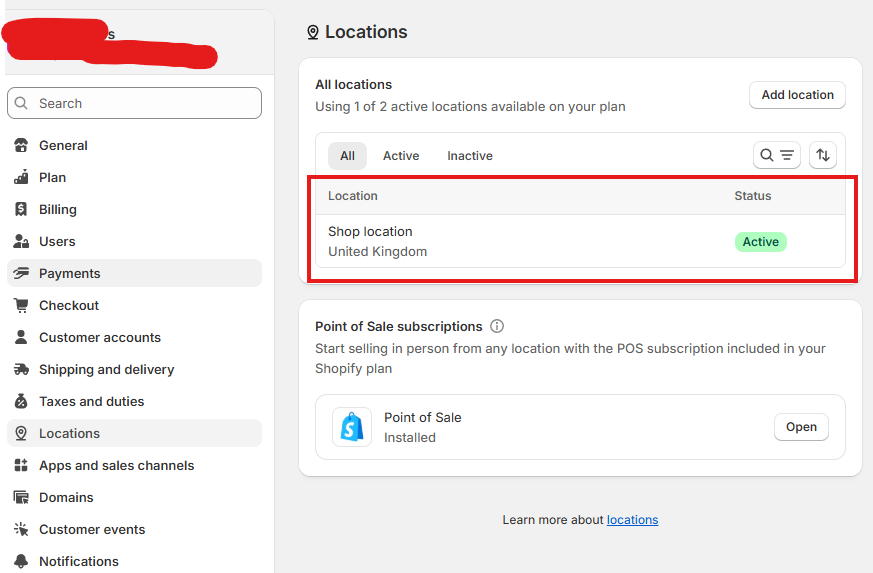
Locations.
This is where you can list your business address if you have an in-person store.
Add your address.
Then you can turn on Pickup in store.
Apps.
I will make sure your website is connected with any apps you request. You probably don’t need any other than the ones that come with shopify. If you feel like you are needing some more, get in touch.
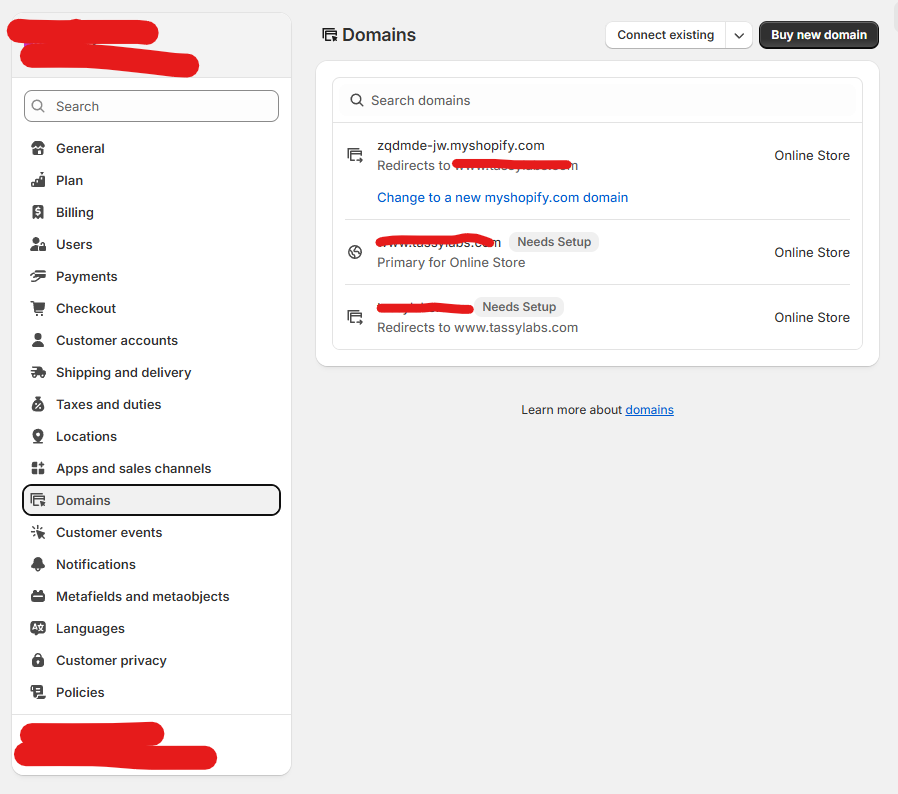
Domain.
Your website will come with a domain that matches your brand name. If you already have a domain, we can connect it. You will fund the domain name. These do not cost much to buy. NameCheap, GoDaddy, and Wix are all strong places to buy the domain from.
Customer Events.
If you are interested in analytics, I can set up a few apps to track customer usage of your site. Please get in touch if you wish for me to do this. This is non-essential, and is probably only worth adding once you get some traffic to your site.
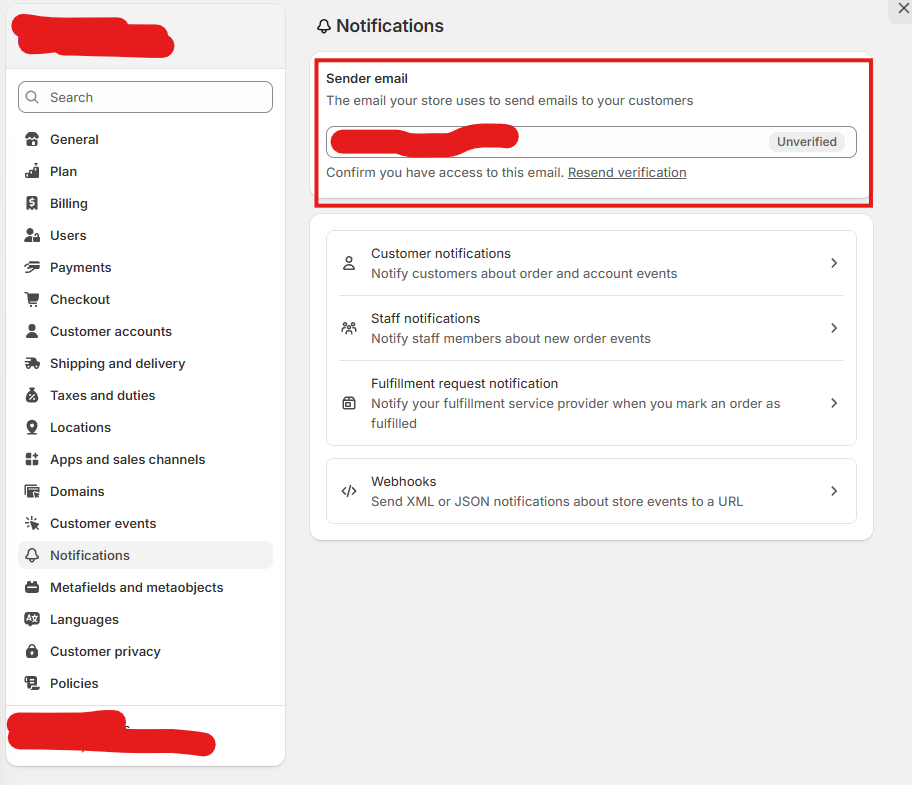
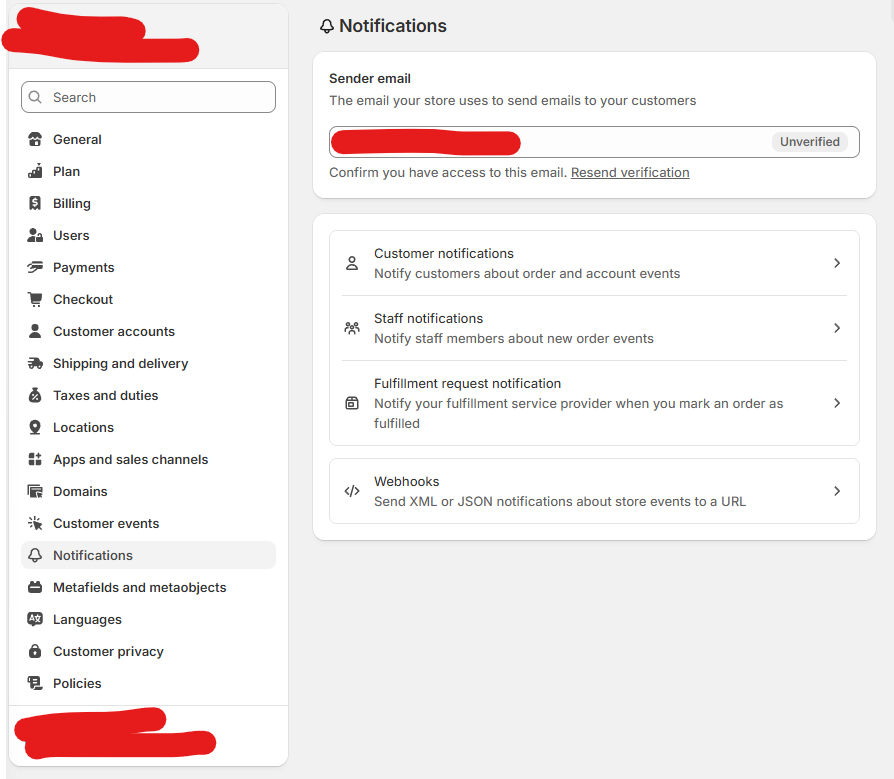
Notifications.
Once I hand the website over to you, one of the things I will do is change the email address which will send email notifications to your customers. If you wish for this to be different to your business email address, please specify. Similarly, if you wish to change it, you can click on this field and change it. You will need to verify it, so ensure that you have access to the new email.
I will have set up email templates so that they match your brand. You do not need to edit anything here. If you want a more personal message to be added to your emails, please contact me. This is because the change involves code. It’s something which I can do, but is complicated to explain.
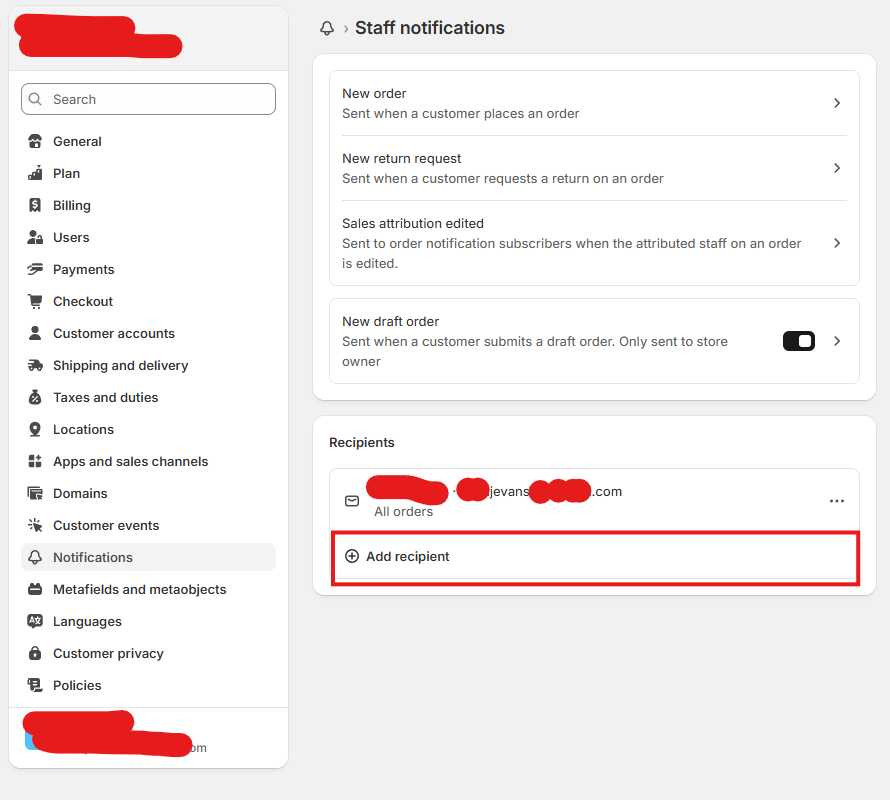
If you want to create a staff email chain for orders, go to ‘Staff notifications’.
Then click ‘Add recipient’ and fill out the staff member’s details. You can also choose what type of emails they will get.
Do not worry about Webhooks.
MetaFields and MetaObjects.
This is an area which is not really important unless you are selling a product with a large amount of variations. MetaFields and Objects allow details to be assigned to products, which can help to sort and organise them within shopify. If this is something you wish to look into, please get in touch.
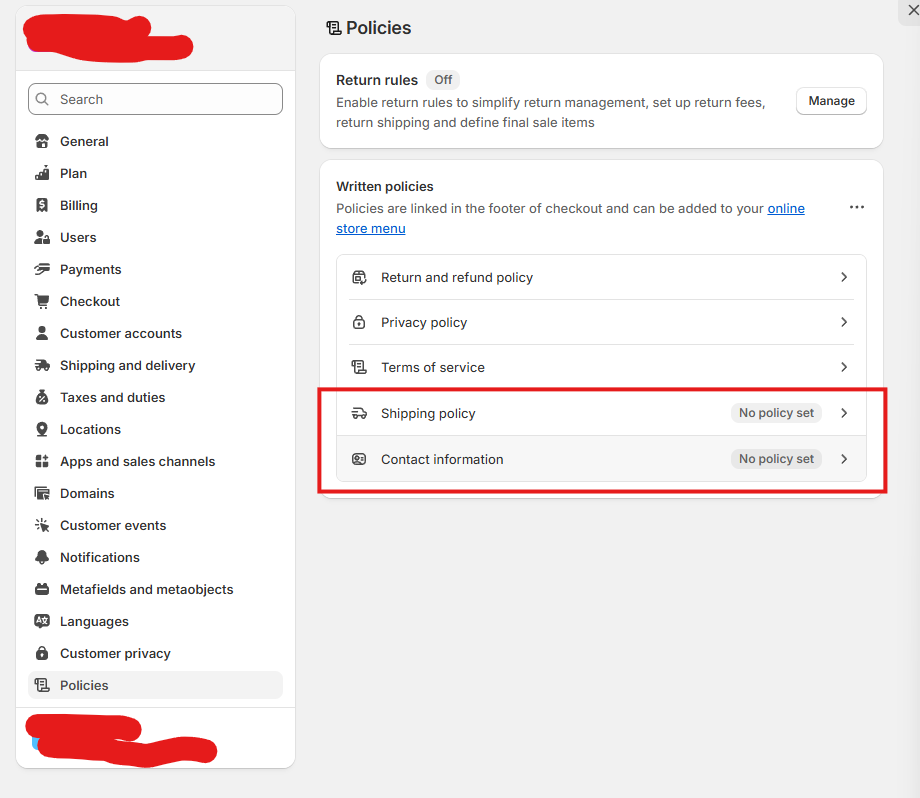
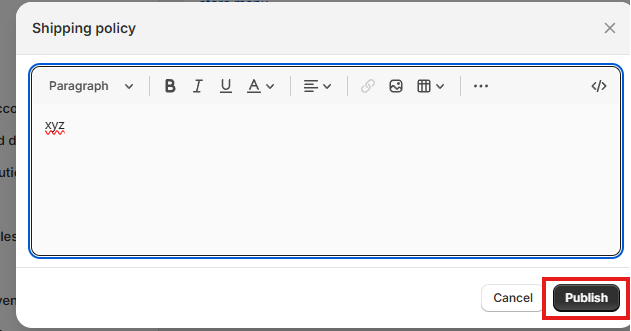
Policies.
Shopify writes structures for the return and refund, privacy, and terms of service policies. Shipping policies and contact information policies need to be customised yourself. I will work with you to create a baseline for these, but if you wish to amend them at any time, follow these steps:
Select the policy you wish to amend.
Paste the policy into the given box.
Click publish.
Home.
Any notifications from Shopify about the website builder will land here. Most things can be dismissed right away.
Orders.
Here is where your orders will show up. They will include shipping information etc.
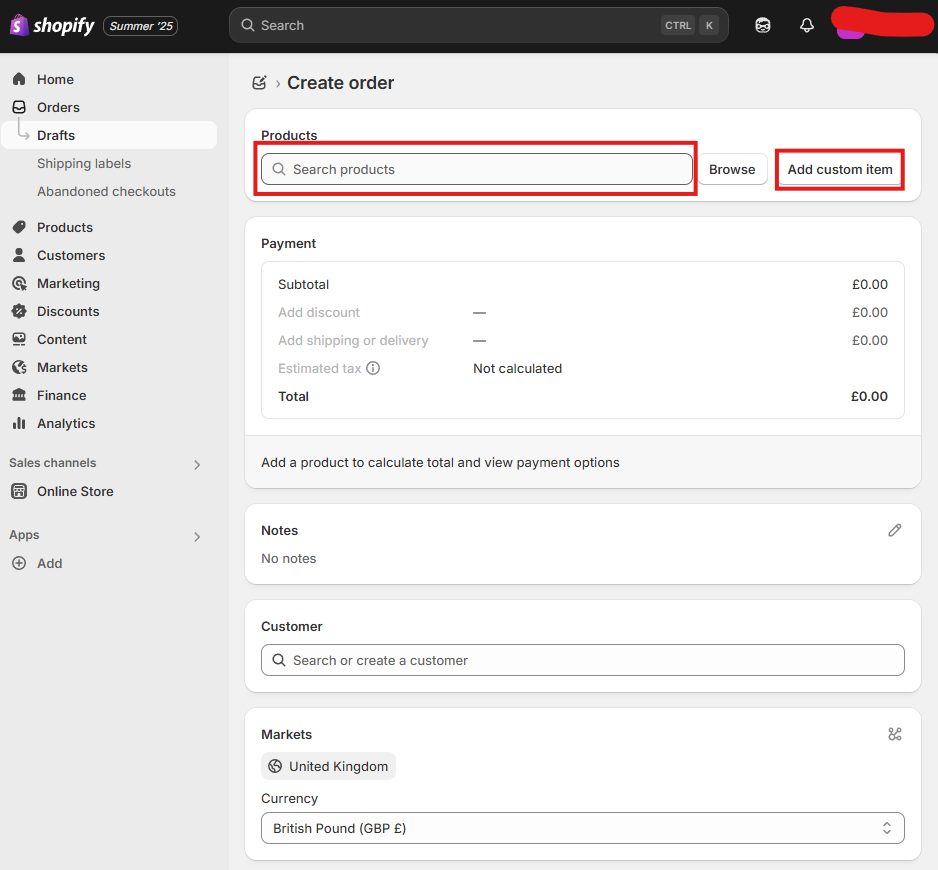
-
Find the products you wish to add by searching. You can also add a custom item here if you should need to.
-
Add notes such as delivery address etc.
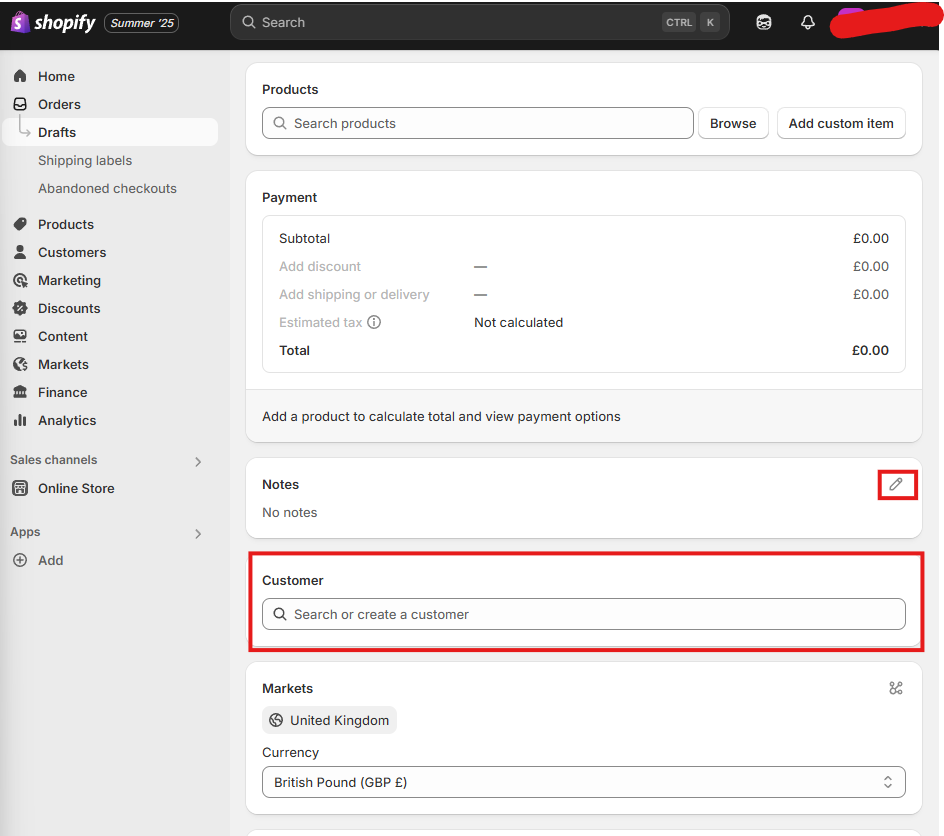
-
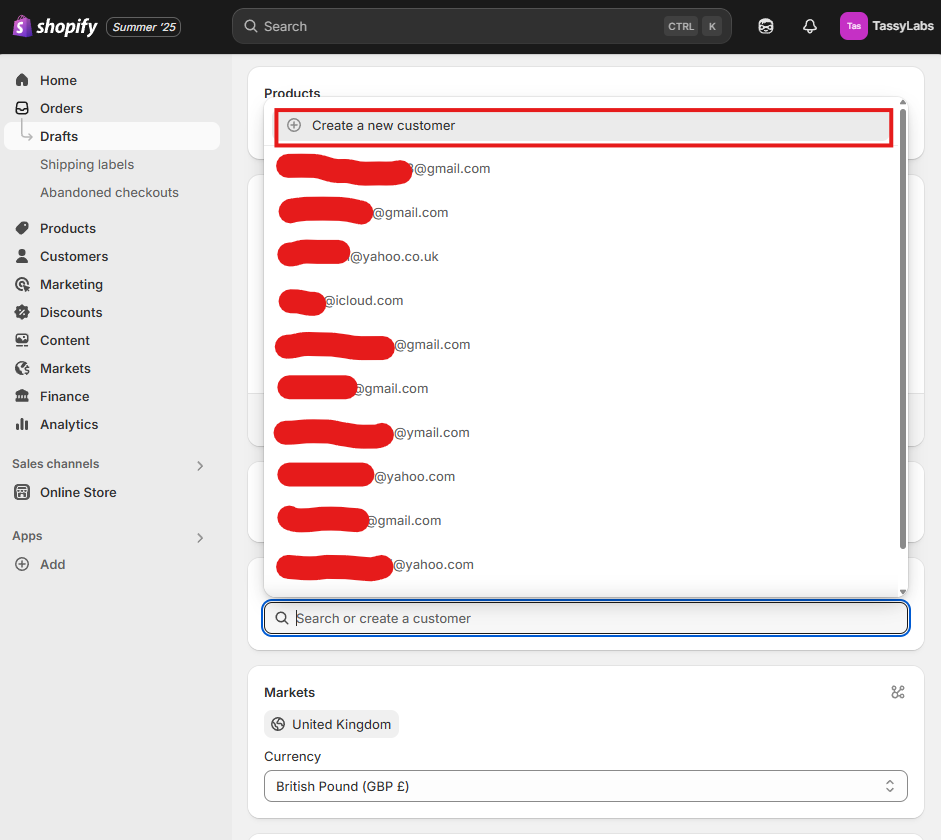
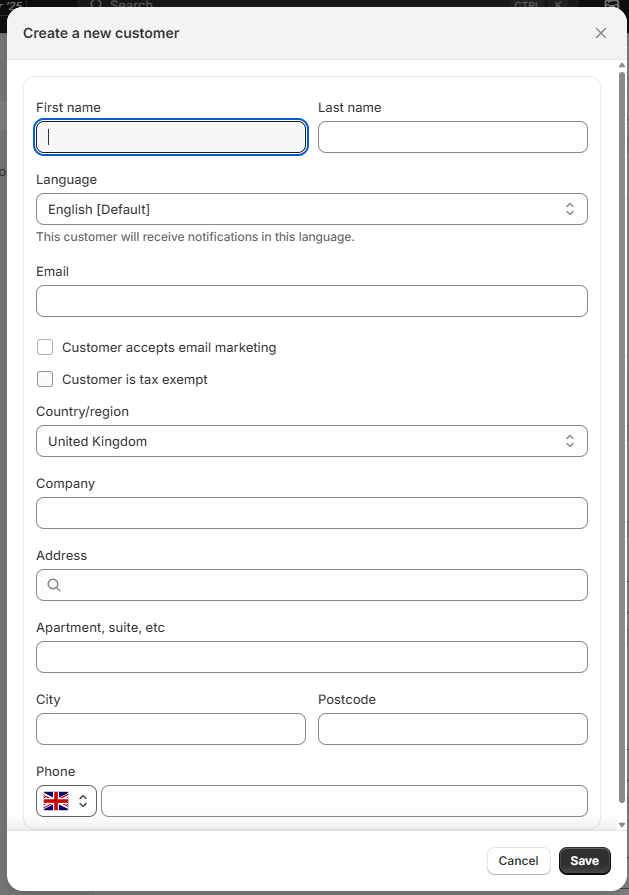
Add a customer. Clicking the search bar will bring up a list of past customers, or you have the option of creating a new customer. Fill out details necessary
-
You have the option to choose the market/currency for the customer. Only do this if necessary.
Tags are optional but may help with organisation.
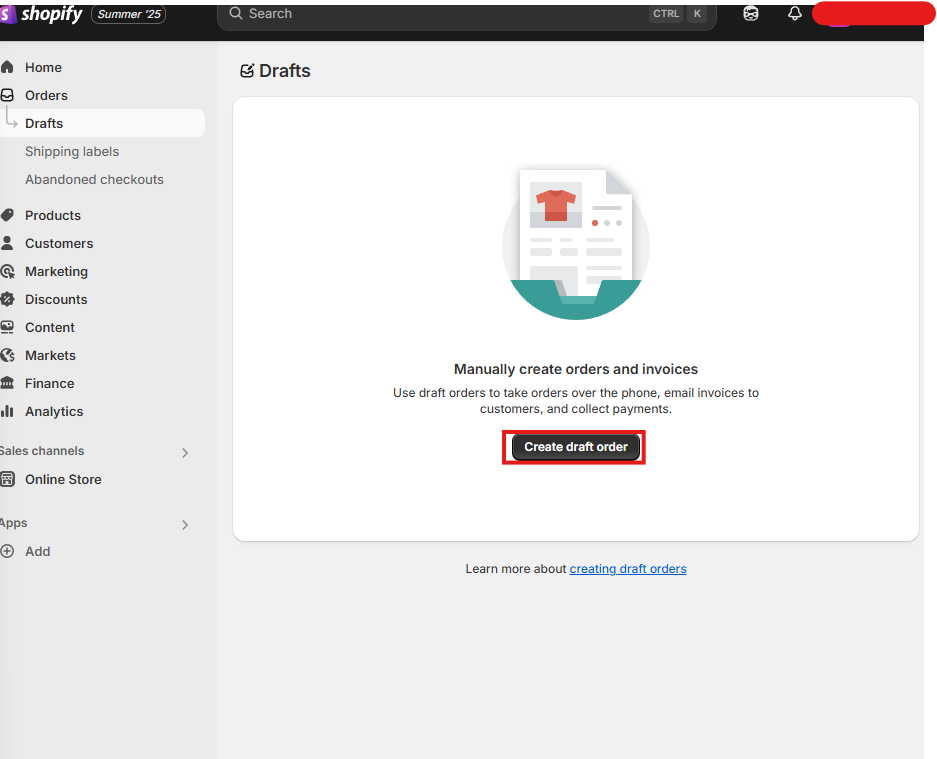
Drafts
-
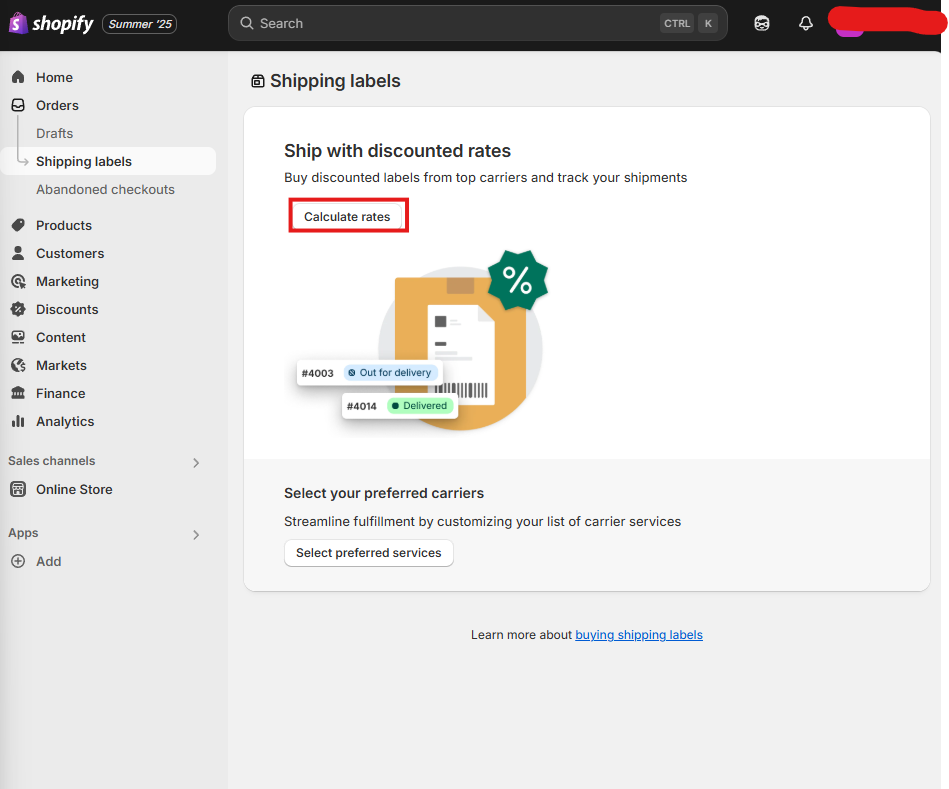
Shipping labels give you the option to work with couriers directly rather than shipping things yourself/relying on the dropshipping service you work with.
The options for the UK are evri, yodel, and DPD. In my personal experience these couriers can be unreliable so move at your own risk when choosing. -
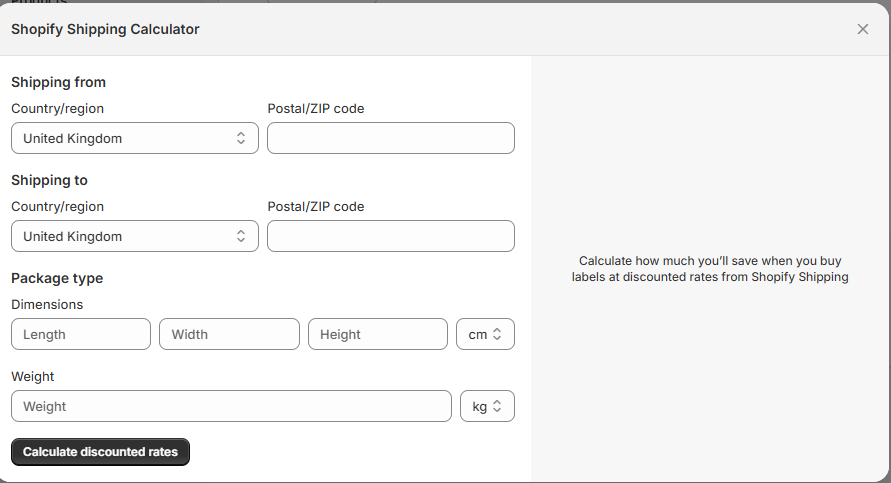
If you wish to ship with discounted rates, click calculate rates. Add the information for what you wish to calculate and click calculate rates. This then shows you the price it would cost to ship to a specific location, to give you an indication of pricing for shipping. This can then be taken into consideration when editing rates under section 11 of this guide.
Shipping Labels.
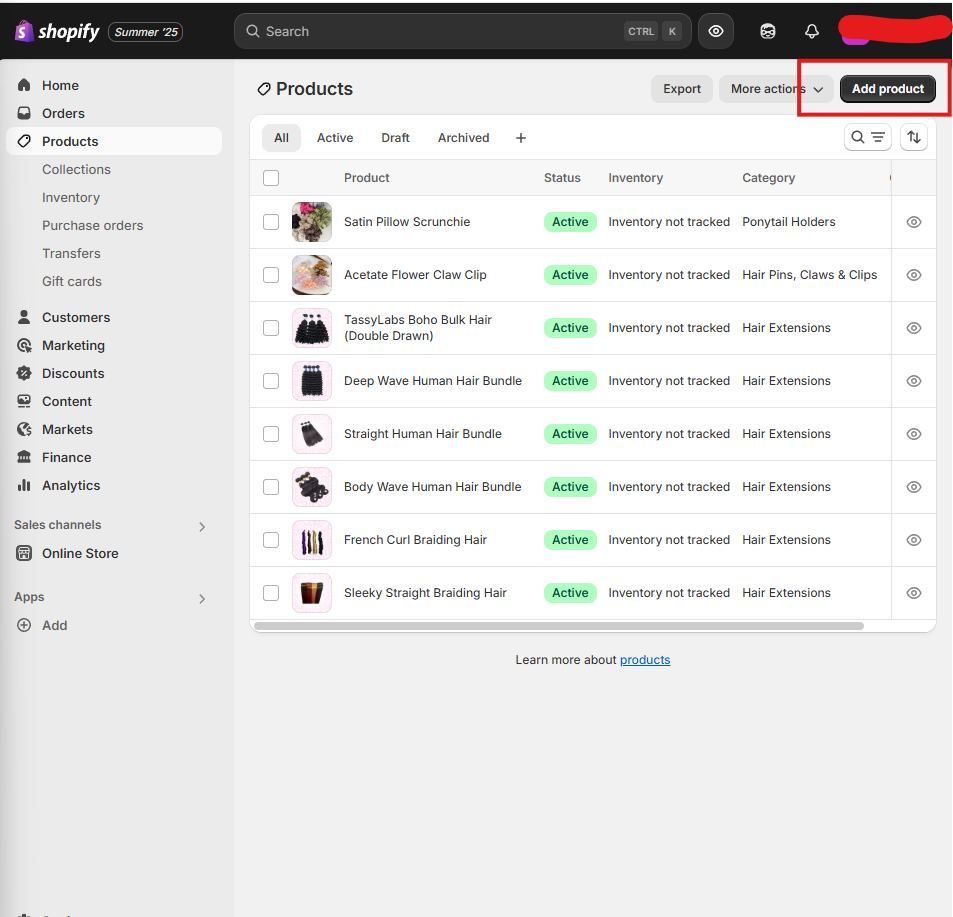
Products.
I will have already populated this area for you. However, there are different steps to follow, depending on what you want to do.
-
First, click 'add product'
-
Populate the title, description, and media areas of the page.
You can add images, videos or 3D models as media.
Fill out the category - this will likely be automatically done for you, especially where your product has a straight-forward name. Just double check it, incase it has gotten it wrong.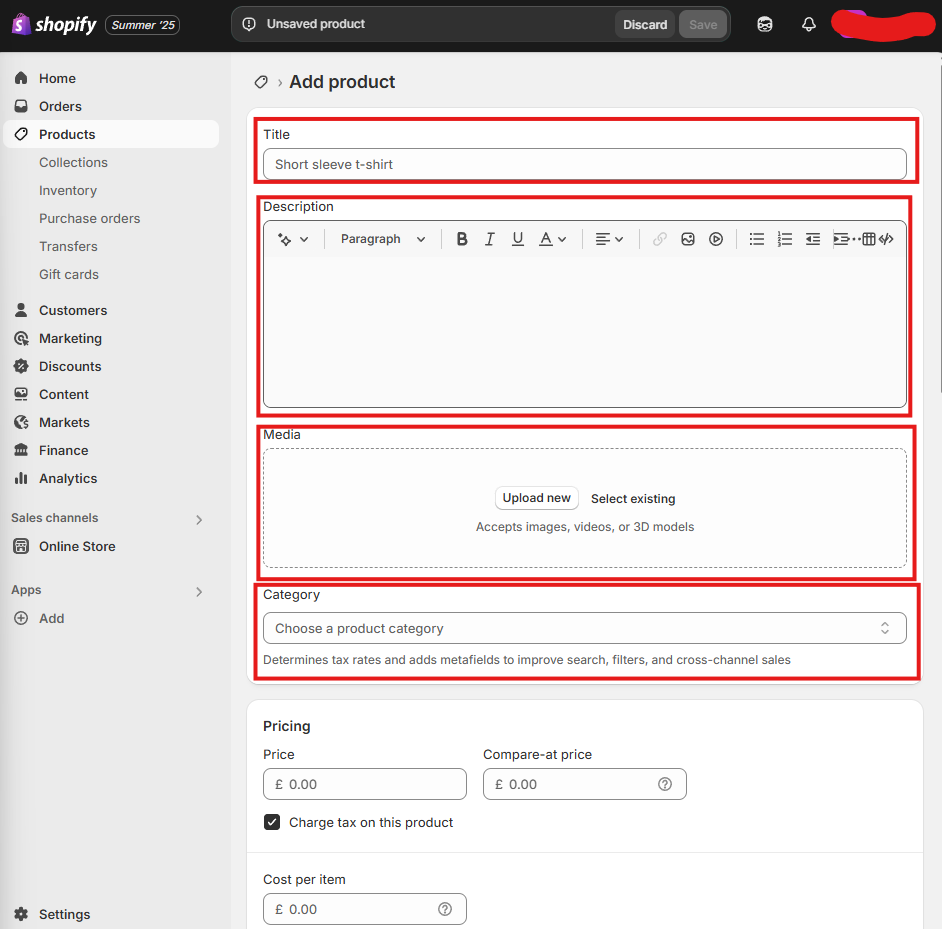
-
Add the price.
‘Compare-at Price’ just means that the page will show the ‘compare-at’ number crossed out, with the price showing. This means that customers can see if they are saving money.
I will not advise on charging tax - you need to research this yourself. There isn’t anything extra to do whether you check this box or not.
You may want to enter your cost per item, as this will help you see how much profit you will make. This is optional.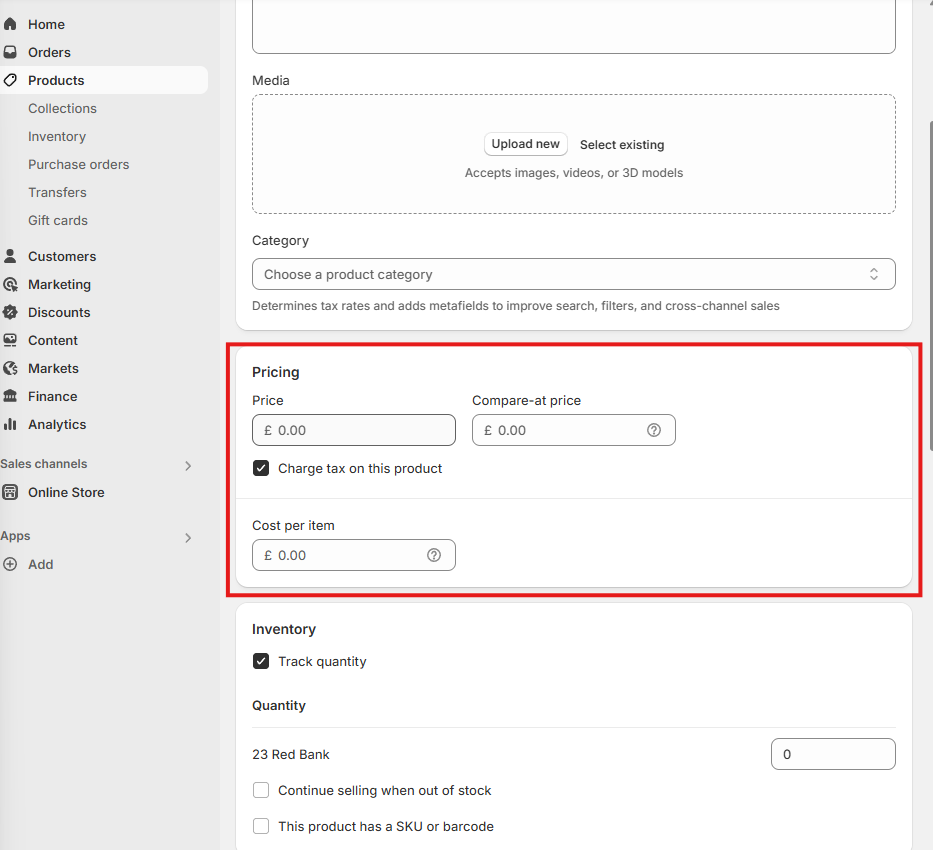
-
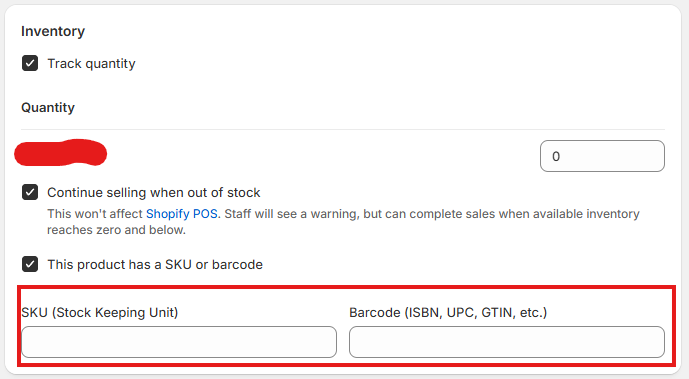
If you are not drop-shipping, you will likely want to track inventory. If this is the case, you need to fill out the number of the product that you have to hand. Drop shippers will have little to no need to track quantity.
You may be able to get quick hold of new stock once you’ve sold out, and in that case you can click ‘continue selling when out of stock’. If you would rather not do this, or want to clear the stock and not replenish it, then do not click this.
If you want to keep detailed track of what is selling and when, then click ‘this product has a SKU or barcode’. Then fill out what the SKU/barcode of the item. This is probably best used when extending a physical store into the online space.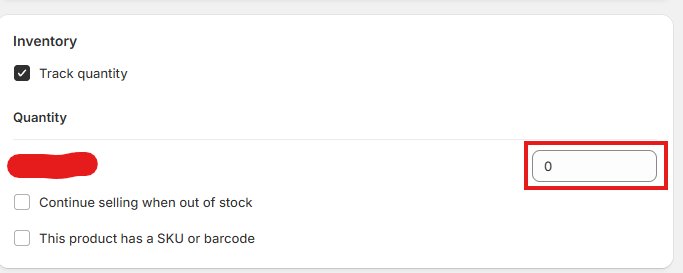
-
If your item is a physical product, you need to know the weight of it for shipping. Fill this out, using whichever units etc suits you.
If shipping internationally, you will need to look at adding customs information. Since this is an area that can get you into legal trouble if done incorrectly, I do not advise on it. Filling it out is straightforward, and there are shopify guides on it if you get stuck.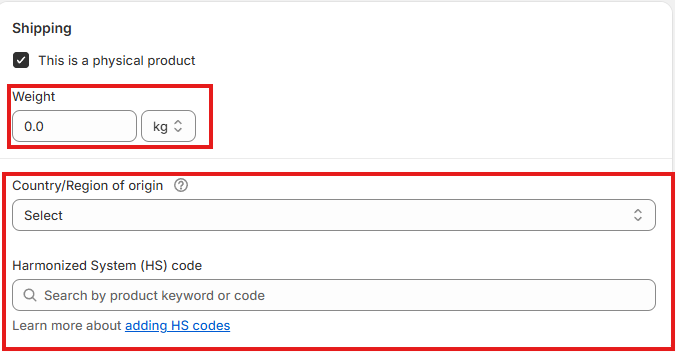
-
You may wish to add variants to the product. You can add multiple classes of variants (such as size AND colour.
Name the variant. This will appear for your customers so make it simple.
Add the values required. Click done when complete.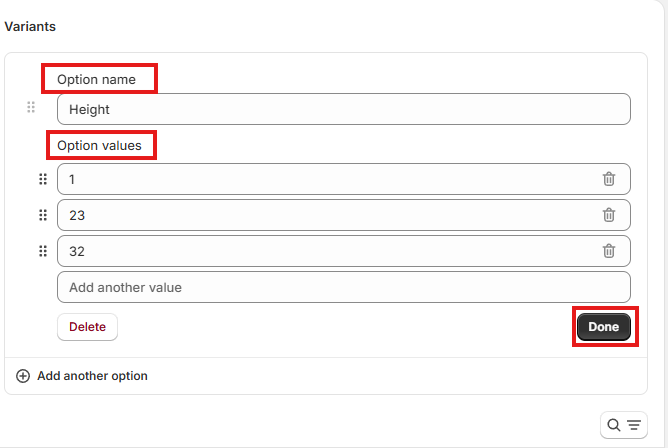
Click add another option if you wish to have multiple variants for the product. Repeat the steps as above.
-
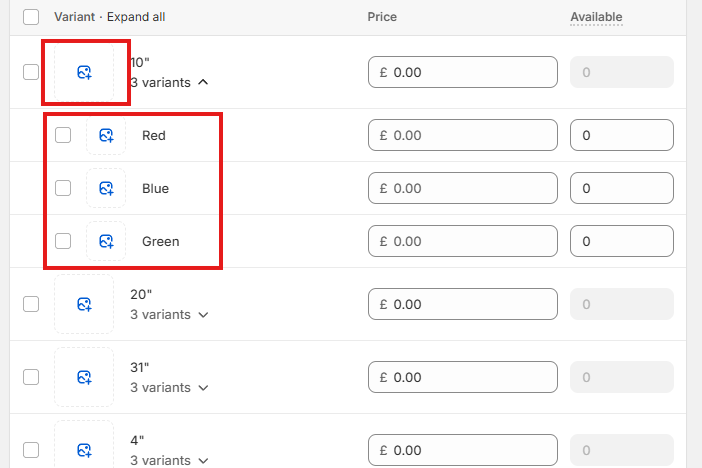
‘Group by’ allows you to choose which variant is nested inside another. For example, you may want for the ‘height’ variant to be the first option that a customer picks, and then the ‘colour’ variant is the second. This is completely down to preference, you can change it to suit your needs.
If different variants cost different amounts, you can apply this here. The same goes for availability.
One thing that I would highly recommend is to add images for each variant type. This helps users see what they have selected more clearly. To do this, just click the add image icon, and add the image that you wish to use.
You can tell that a variant is nested within another as it appears ‘tabbed in’ under the parent variant. This is show underneath. See where it says 10”, and underneath ‘red’, ‘blue’, and ‘green’ seem smaller.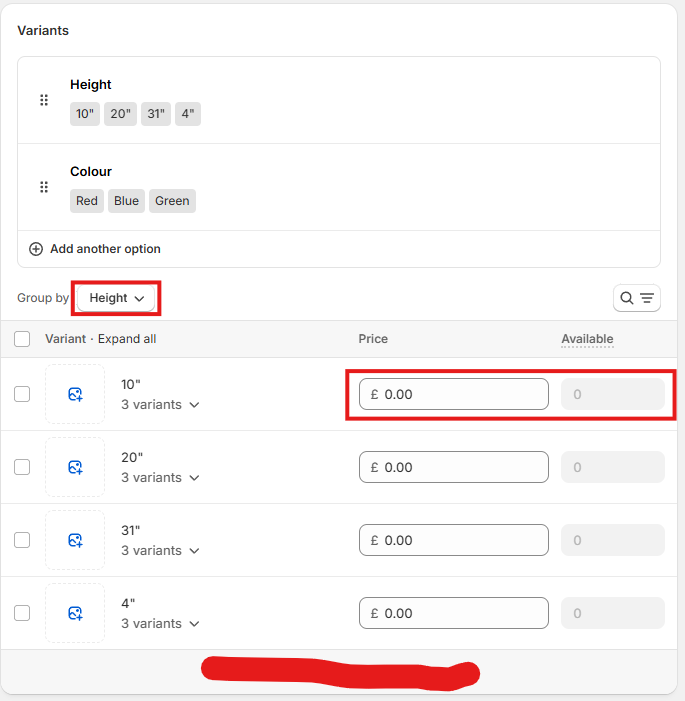
-
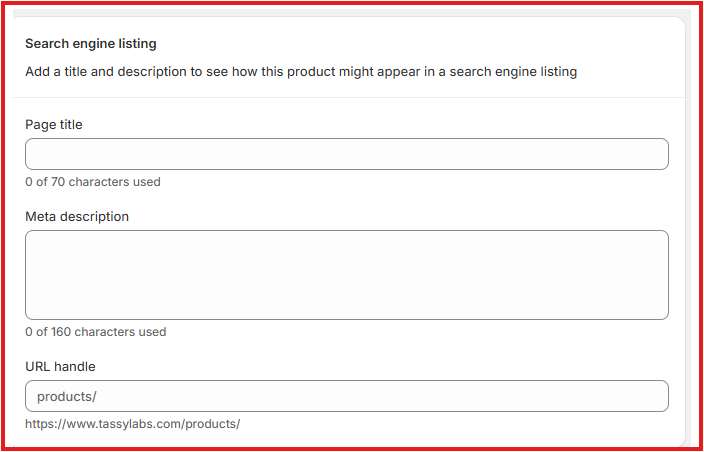
Search engine listing just helps out SEO, making it easier to find your pages. My honest advice would be to get AI to write this for you. The page title should be the same as the product title, and the URL handle should be products/yourItemName. Replace 'yourItemName' with the actual item name.
-
Product organization does exactly that. It helps to keep things within your store organised.
It is fairly straightforward to fill out yourself - ‘vendor’ should be the name of your store.
Here is a good time to add the product to a collection, although this can be done later if necessary. You may have products organised by collections on your site, and by not adding the product to a collection, it may not show to customers. I always create a default collection called ‘All’ - at the very least, you need to add every product to this. We will discuss how to create a collection later.
Tags need to be simple and easy to understand. You can ask AI to help you optimise these for SEO.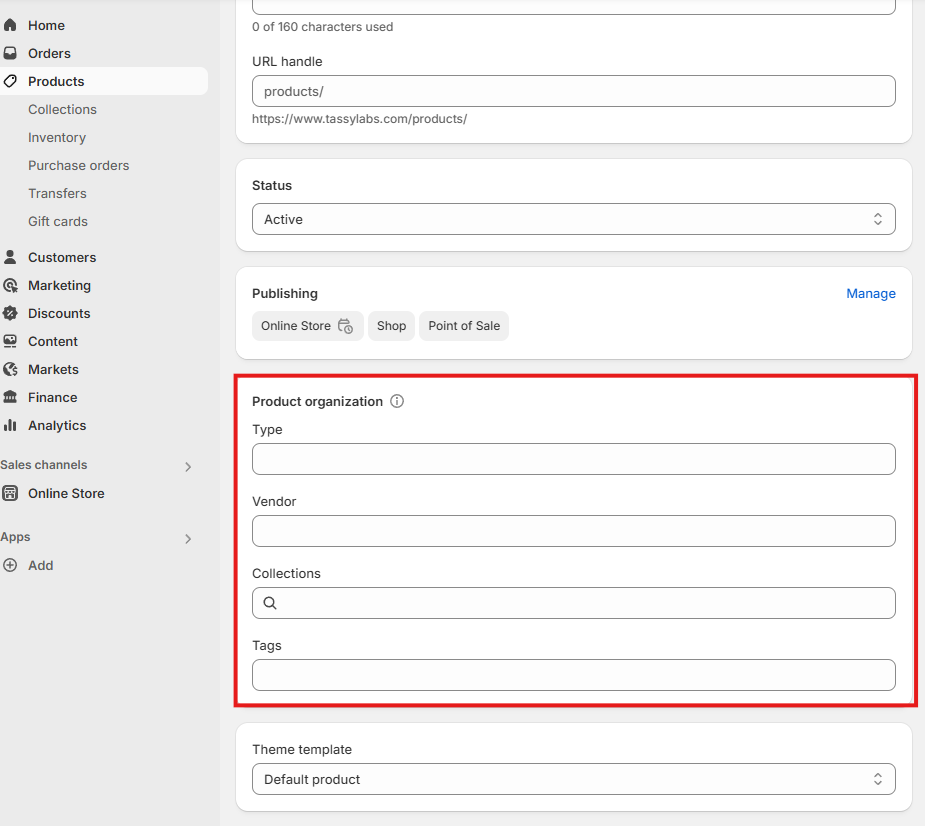
-
You need to ensure that the ‘Theme template’ is correct. Usually I will tell you which template is the one to use. It will normally have a name such as ‘ClassicProduct’. If you do not select the right template, the product page will not look right. Any issues with this, just ask.
-
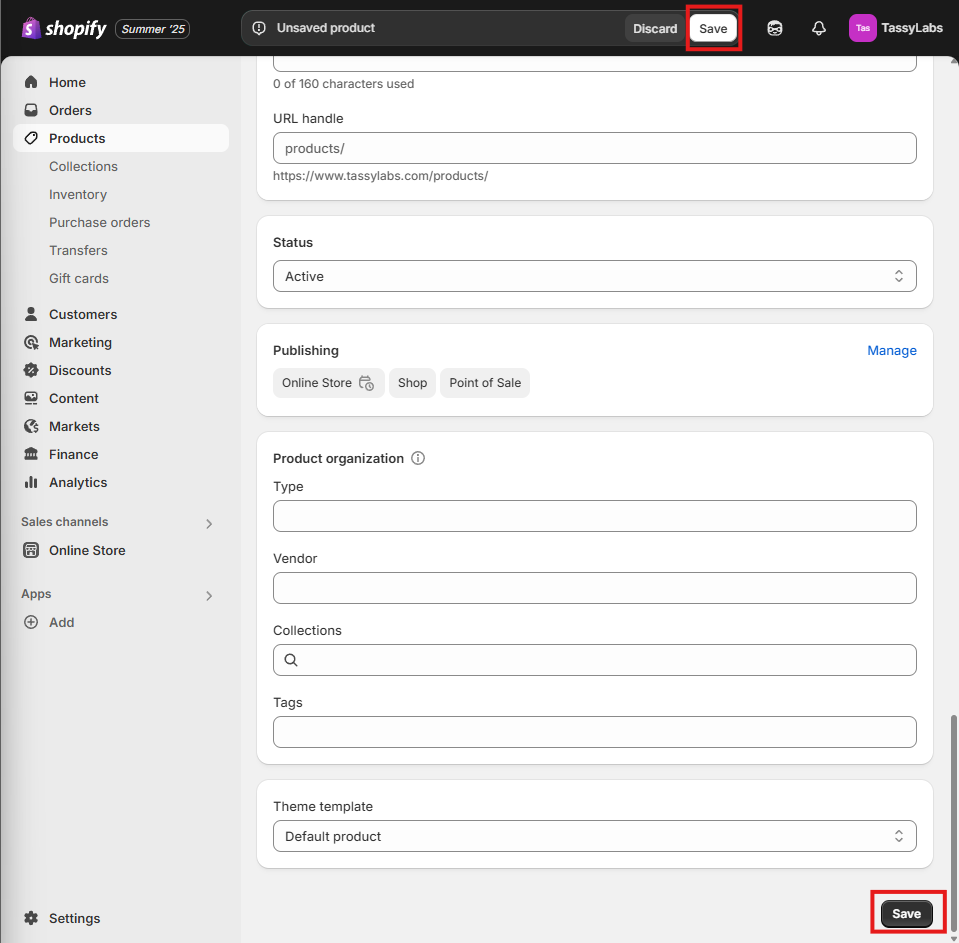
At the end, make sure you click save! It will show as a pop-up at the top, or at the bottom of the page.
-
Just click on it in the products list page! All areas remain the same as when adding a product, so you can change what is needed as an when you need to.
Remember to SAVE! -
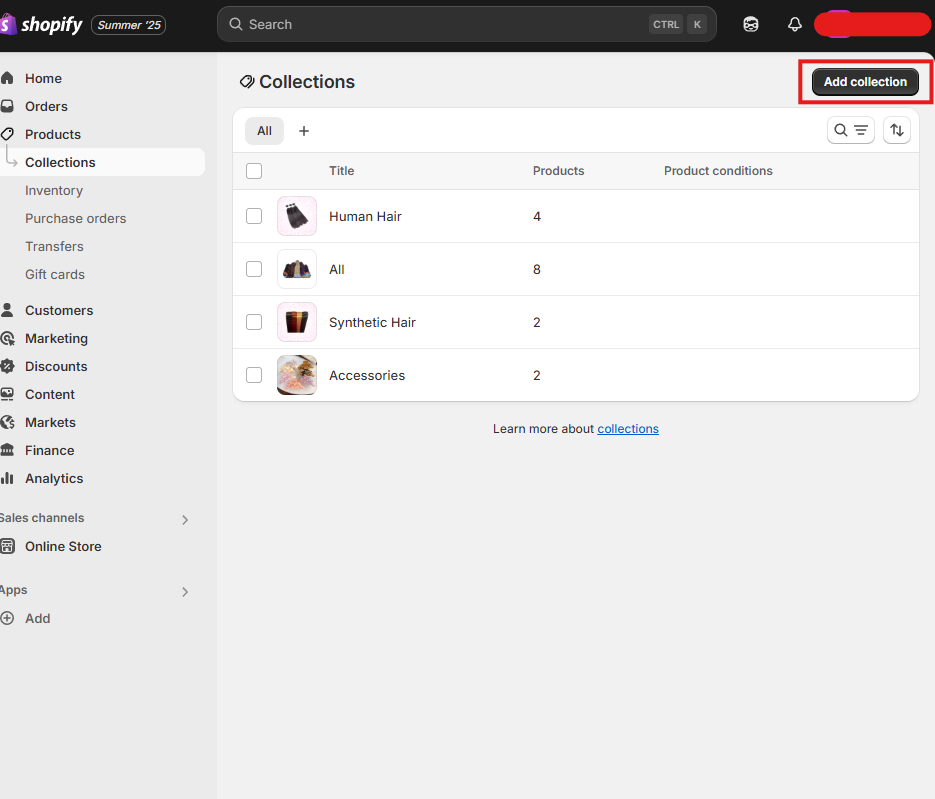
Collections help to organise your products, both for you and your customers. To add a collection, first click ‘Add collection’.
-
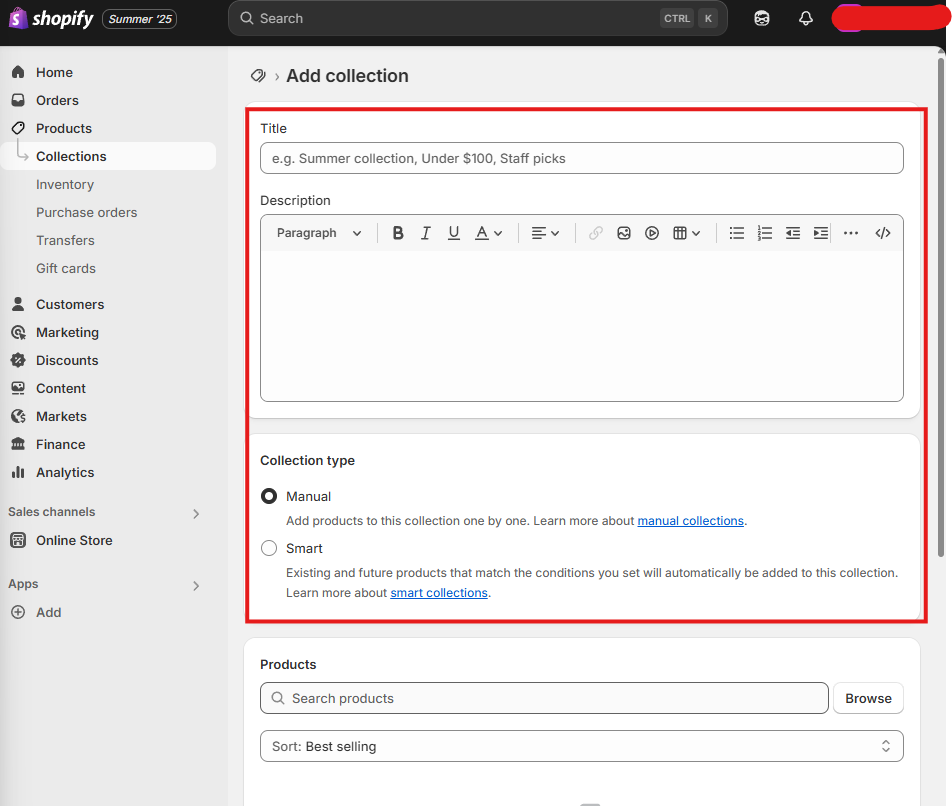
Add a title and description. Set collection type to manual.
-
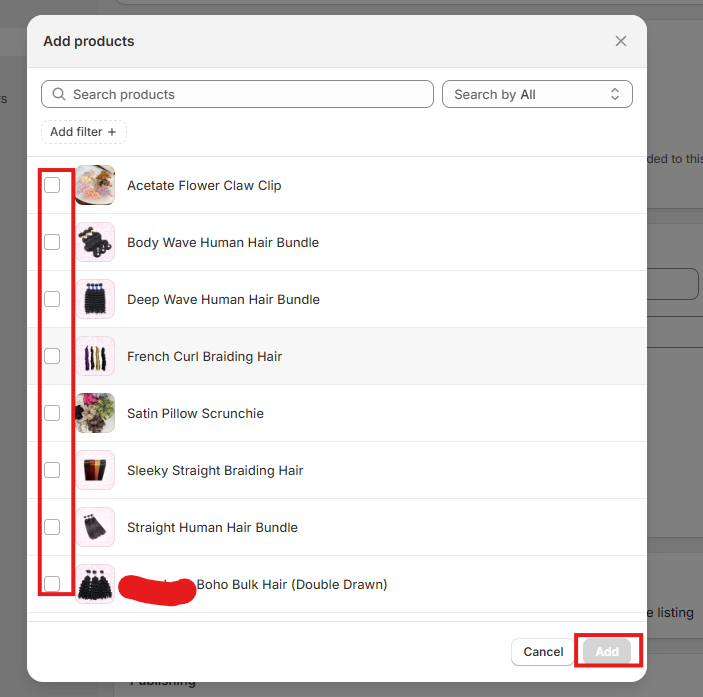
Add the desired products to the collection. If you know the exact product, you can search, otherwise click ‘browse’. Select the desired product(s), and click ‘add’.
The same product can be placed into multiple collections.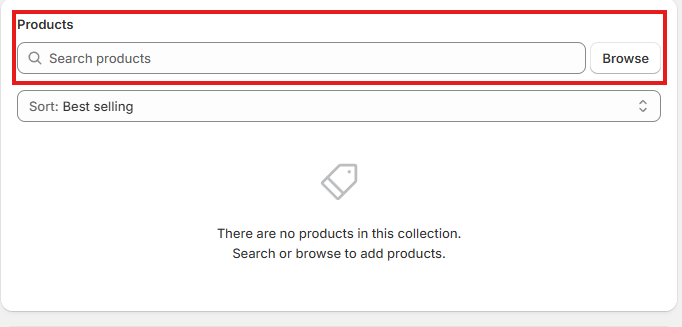
-
Search engine listing just helps out SEO, making it easier to find your pages. My honest advice would be to get AI to write this for you. The page title should be the same as the collection title, and the URL handle should be collections/yourCollectionName.
-
Add an image that represents the collection. Customers can see this so keep that in mind. I like to use the main image from the best selling item within the collection.
-
You need to ensure that the ‘Theme template’ is correct. Usually I will tell you which template is the one to use. It will normally have a name such as ‘ClassicCollection’. If you do not select the right template, the collection page will not look right. Any issues with this, just ask.
At the end, make sure you click save! It will show as a pop-up at the top, or at the bottom of the page. -
Click on the collection in the collection list, and change whatever you need to. The process is the same as creating a collection. Make sure you SAVE!
-
This is only relevant if you have enabled inventory tracking on your products. Here, you can edit and view inventory counts.
-
Purchase orders helps you to keep track of orders that YOU have made.
I am not sure I would choose to do this via shopify, but the option is there if you wish to use it.
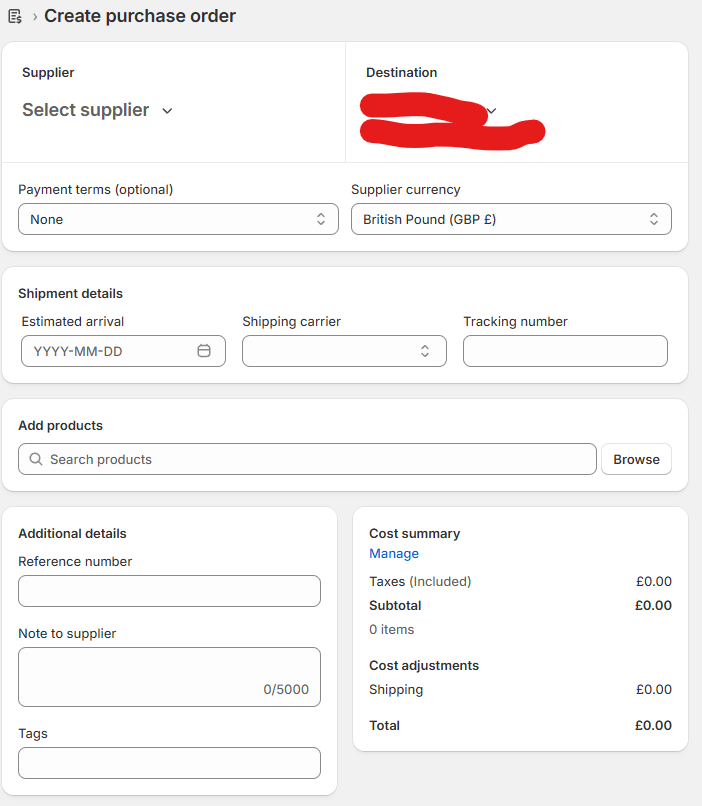
Just click ‘Create purchase order’. Then fill out the form. You can create multiple purchase orders.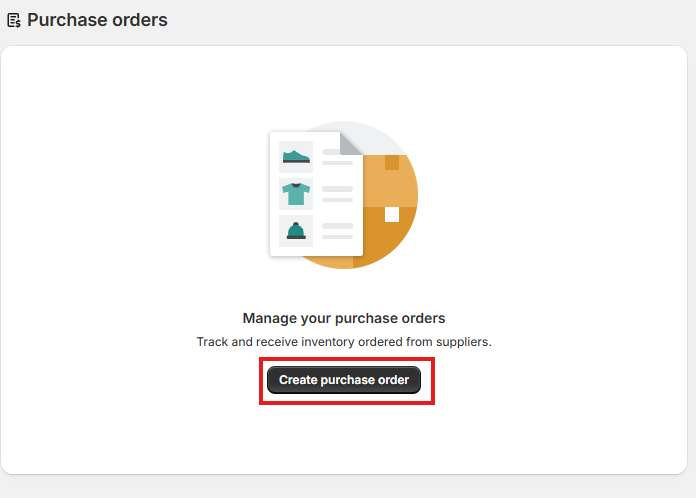
-
This is only relevant if you have multiple sites and wish to move stock around between them. Again, I’m not sure that shopify would be my first choice to keep track of this anyway.
-
You may choose to create gift cards as an option for your customers.
To do this, click ‘create gift card’. You need to input the value, and assign it to a customer.
You might like to change the gift card code to be something more simple yet unique to each gift card. You could ask AI to do this for you!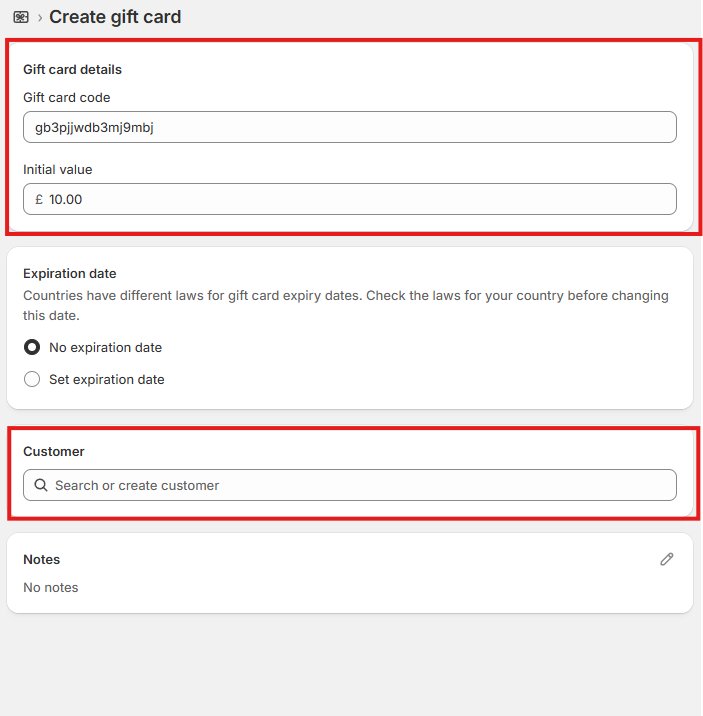
Add a NEW product.
To EDIT a product
Collections
To EDIT a collection
Inventory
Purchase orders.
Transfers
Gift cards.
Customers.
Here you can see repeat customers etc. You don’t need to do much with this, but the database is useful for seeing customer info when it is needed.
Marketing.
This is a section to link marketing campaigns on social media to your shopify store.
I CATEGORICALLY DO NOT deal with marketing. I will not advise on this section at all, please seek other professional guidance on this area if you wish to use it.
Discounts.
Here you can create discount codes to be used by the customers.
To start, click ‘create discount’. You will be faced with an option for the type of discount you wish to create. Choose one.
The discounts are generally very easy to figure out, and since what you will be doing for each one will differ, I don’t think I need to advise on this.
Some points to note are:
- The more a discount will benefit a customer, the more complex the discount code should be. For example, if you wish to give customers 10% off, a suitable code would be ‘OFF10’. However, if you wanted to give people a large discount on large orders, you should make this more complex so that it is harder to guess. This is also true for discounts that should only be available after a customer completes something (e.g. writes a review for you etc).
- You can place restrictions on discounts, such as the number of times it can be used, and whether it can be used in conjunction with other discounts. This is of course different for each store.
- You can offer to specific customers or segments (groups) of customers.
- You can play around with the settings until you have built a discount that fits your needs. I am also available to create these for you if you would prefer.
Content.
Here, you can edit and view metaobjects, files, menus and blog posts.
-
Metaobjects were explained earlier under section 17.
If you want to change the images for a given variant, this can be done here.
Mainly, it’s nice to be able to view them all in one place. -
Files just contains all the media which you have put on the site. It is again useful to have one place where everything is contained.
One thing here that is particularly useful is that you can replace an image. Just click the replace icon (shown below), and choose the image you wish to replace with.
-
Menus allow you to adjust what is included in a given menu. The ones that exist already will be the only ones visible in the store page. For this reason, it is important that you only edit these, and that you do not add new ones. ESPECIALLY, please do not delete the ones you find in this area.
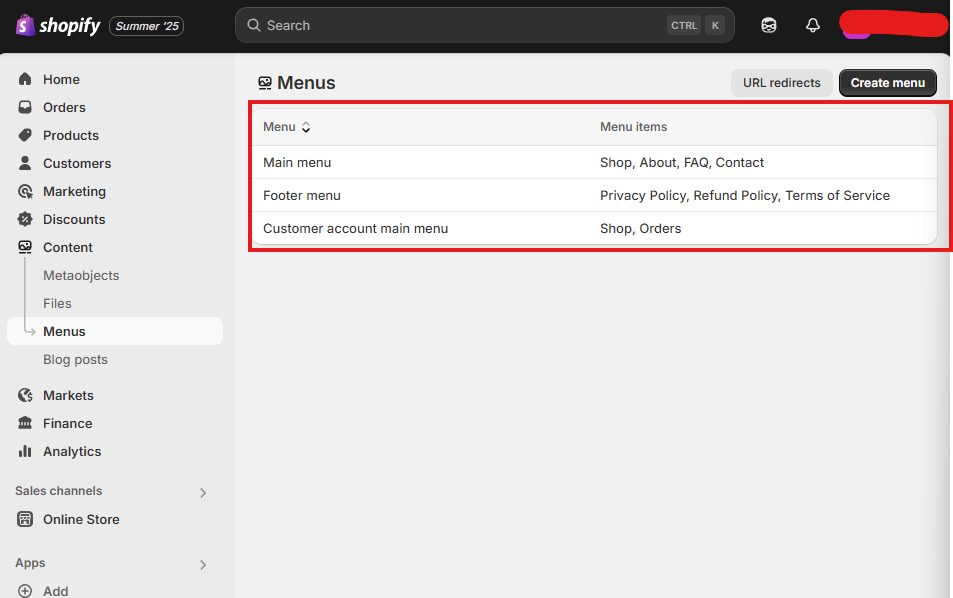
The only time you will need to edit menus is if you add/remove pages. This can only be done with the help of a web designer such as myself.
If you are having issues or want to change your menus, please get in touch.
Metaobjects.
Files.
Menus.
Markets.
Markets are made in conjunction with shipping areas. I have explained how to create a market in section 10, and you can create another market here, in the same way.
You can click on markets in order to edit them. Make sure that you update shipping rates etc if you update the market.
Catalogs won’t be of much use - I can see this function leaving the site within the next few months as it is almost completely redundant.
Analytics.
This is a really interesting feature. Nothing you do/see in this section impacts the store, but it gives you a wealth of information regarding site visits, customers etc. There are 150 different report types to look through.
I would recommend taking some time to read through these, finding the ones that you might want to view daily/weekly to see how your store is doing.